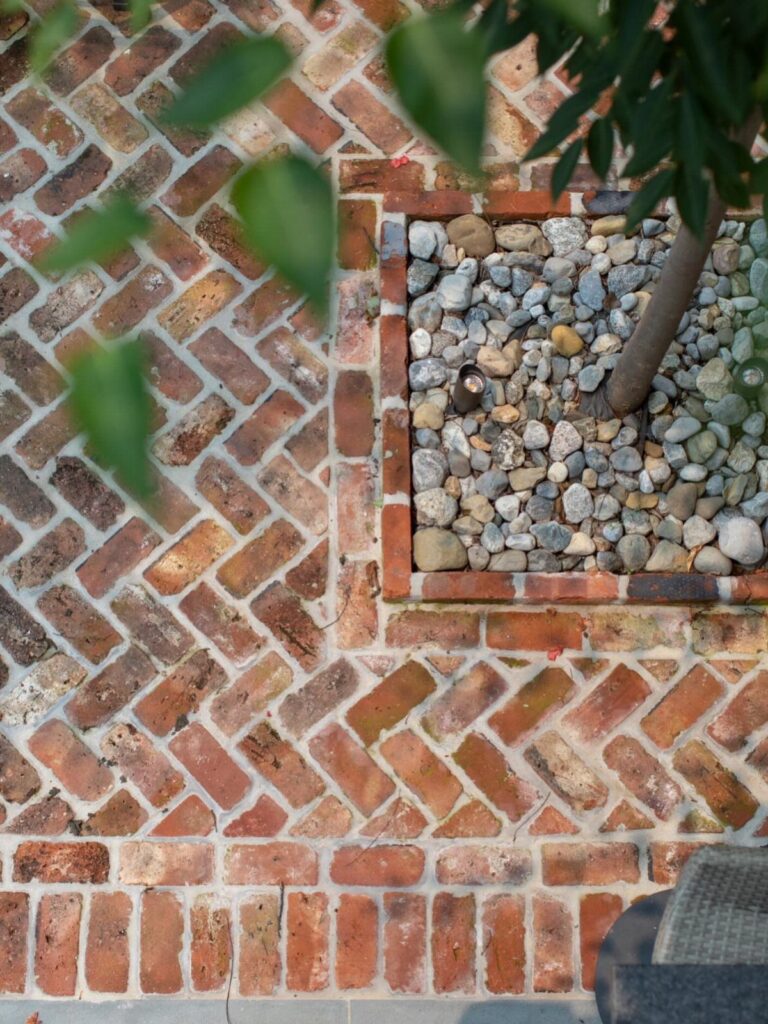
Brick patio designs range from a straightforward running bond you can finish in one weekend to a herringbone pattern that eats more bricks and time but locks together so tight it barely shifts.
The deciding factor is the size of your space and how much complexity it can absorb before the floor turns into a busy quilt.
A dry laid install over sand and gravel runs $12–$25 per square foot installed, or near the bottom of that range if you handle the labor yourself and stick to straight edges and right angles.
[link-whisper-related-posts]1. Herringbone Pattern
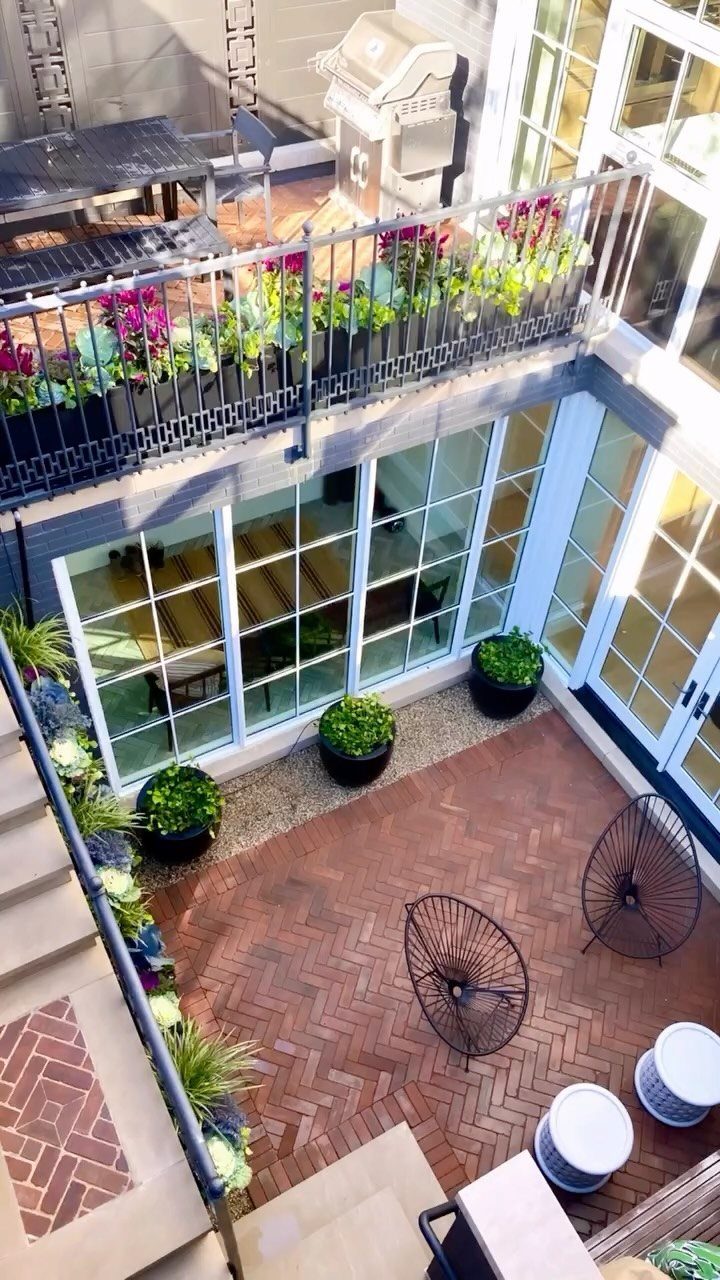
Bricks laid at 45 or 90 degrees lock together in a V-shape that resists shifting underfoot, which matters if your patio sees heavy traffic or you park on it.
The pattern reads as formal without feeling stiff, and it carries the visual weight that makes a small courtyard feel intentional rather than cramped.
I would not try this as a first brick project. The cuts multiply fast, and every angle has to stay true or the zigzag wobbles.
A contractor quoted me roughly double the labor of a running bond for a comparable footprint, which tracks with what the masonry guides say about the time involved.
If you are handy and patient, rent a wet saw and budget a full weekend; the cutting takes longer than the laying.

✅ 100% QUALITY🌲 Betonex Concrete Molds Plastic Molds for the making patio concrete tiles. Reusable Paving mold for concrete - Easy to use to create a wonderful garden walkway, garden path stones, stepping stones, pathway, backyard path.

Used Book in Good Condition

The timeless & clean look of pavers, but with the durability and stamina of concrete. Tight-fitting common pavers in a herringbone layout. Great for indoor and outdoor applications. Mild texture and joints are perfect when surface texture and safety are a concern. Distinct v-shaped weaving pattern.
2. Running Bond
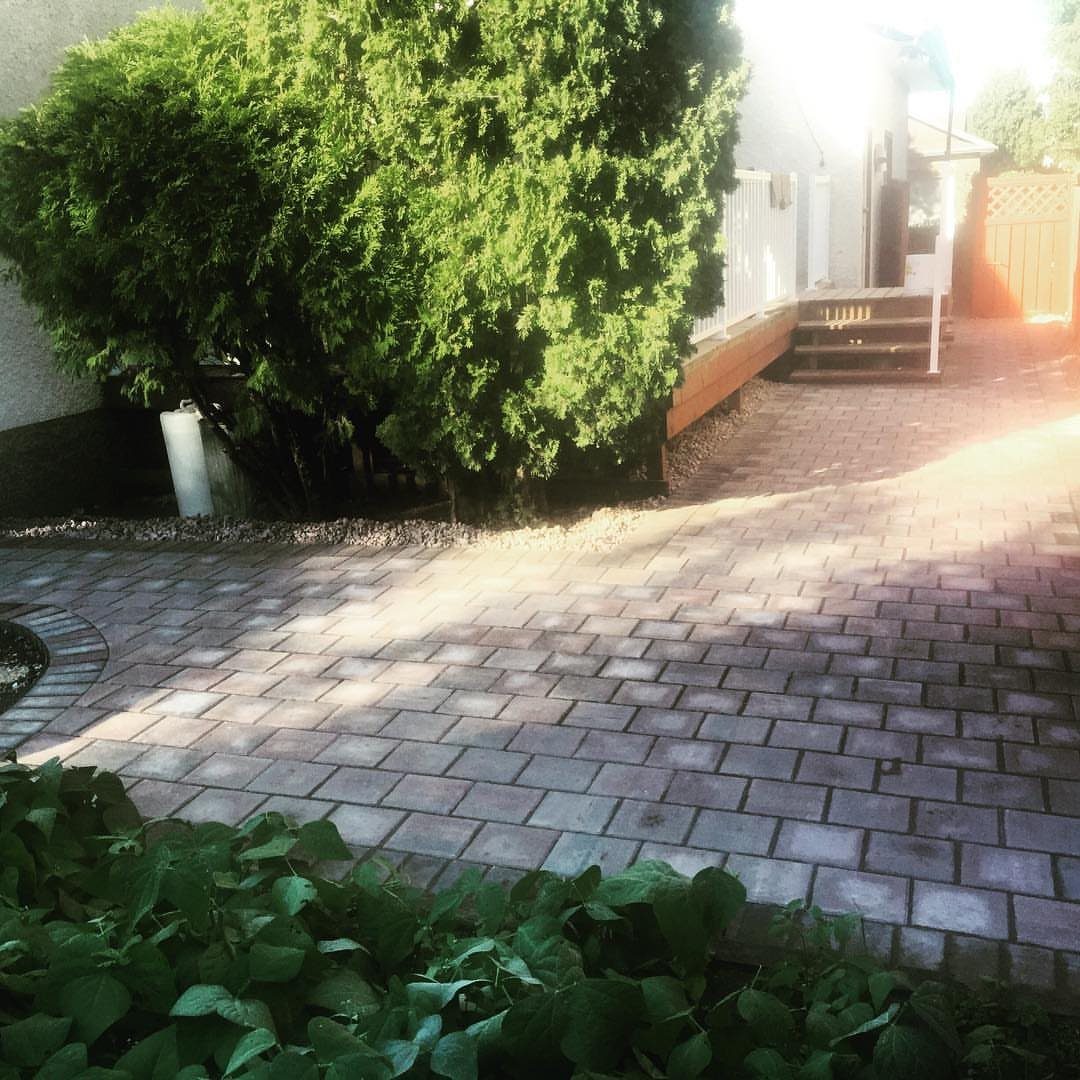
Running bond suits curves and straight lines equally, and you can vary the brick lengths across rows if you want something less rigid than the standard uniform look.
This is the pattern I would start with.
The stagger hides minor cutting errors, and you can lay it without angled cuts except at the edges. The whole surface took a Saturday and Sunday with one other person.

Builds strong retaining walls and stonework
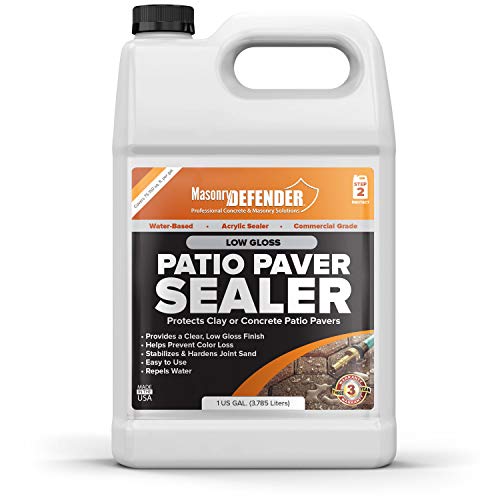
CLEAR WATERPROOF PROTECTION: Water based acrylic sealer dries clear with a low gloss finish, enhancing and protecting surfaces from fading. VOC-compliant and prevents color loss without yellowing.
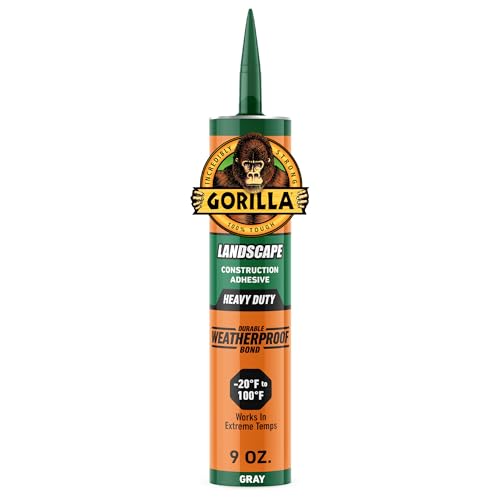
HEAVY DUTY LANDSCAPE ADHESIVE: Built for demanding outdoor and landscaping projects where a strong, reliable bond is required
3. Basket Weave Pattern
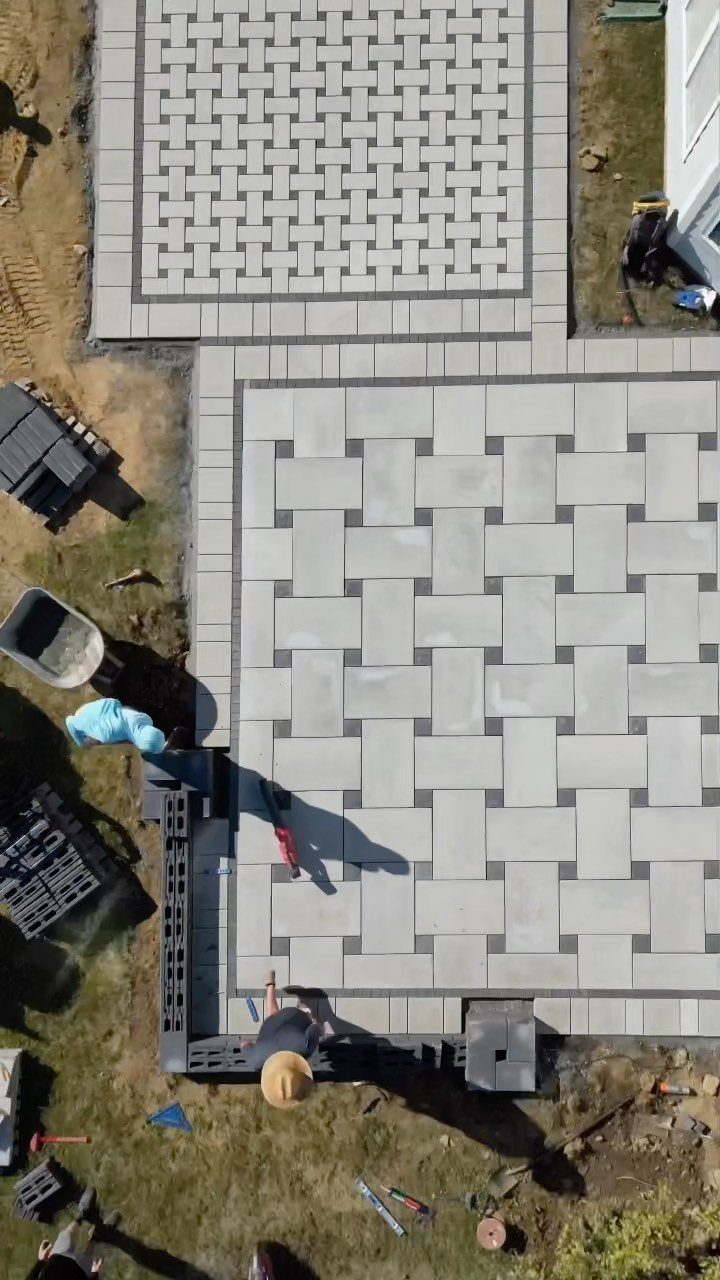
Basket weave breaks up a large patio into human-scale squares, which keeps a broad expanse from feeling like a parking lot.
The pattern eats space in set groupings, so measure your intended area and check how close you land before you order.
One installer I follow on Instagram mentioned being almost finished with a basket weave patio when I saved the photo; the rhythm of the layout had let him work faster than expected once he got past the first few rows.
Large patios favor this pattern more than small ones, since the effect needs room to repeat.

Durable Steel Construction for Heavy Duty Cutting - Crafted with a strong steel body, 4 1/2 diamond blade for grinder excels in dry and fast cutting. Its ultra-thin turbo design ensures precise, clean cuts with minimal dust, vibration, and debris.

【Reusable】: Garden stones can be used again immediately after you pour your first garden stepping stones, so you don't have to wait.

UNIQUE OUTDOOR WALKWAY SOLUTION: Elevate your garden, lawn, or backyard with BIRDROCK HOME Rubber Stepping Stones. These durable pavers create a functional and stylish walkway, enhancing your landscape while providing a solid and reliable surface to walk on.
4. Circular Pattern
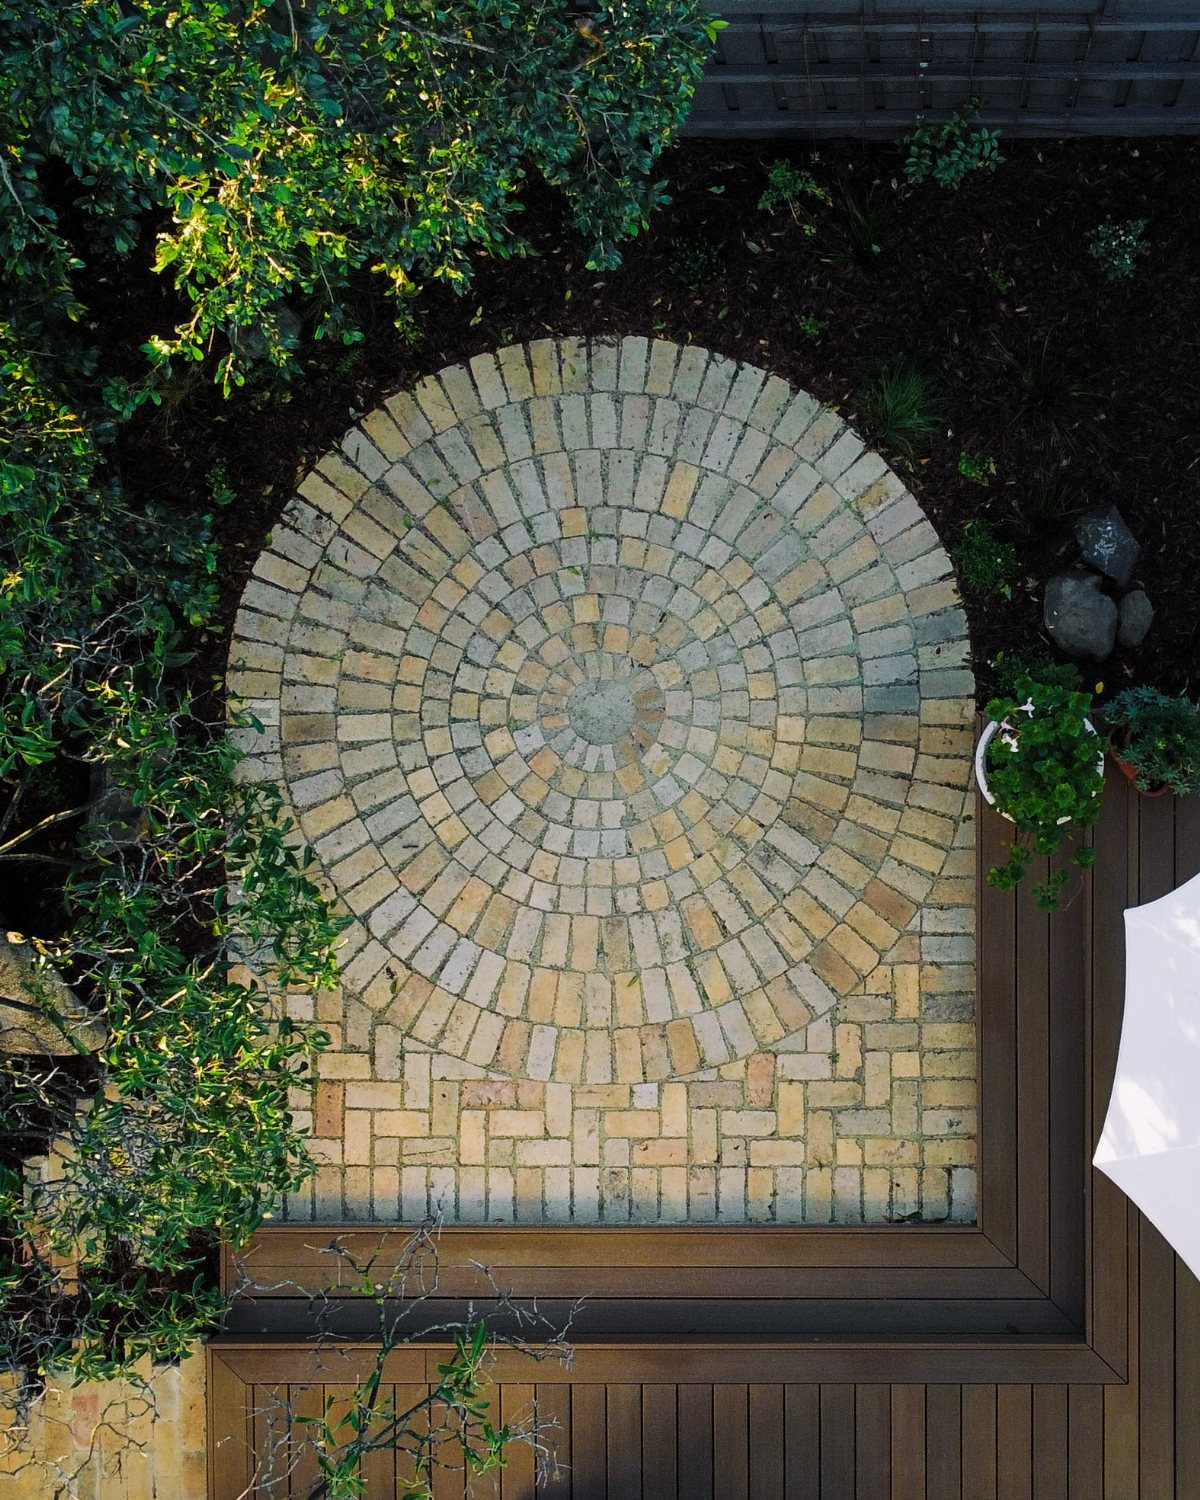
Pavers radiate from a center point in concentric rings or fan out in repeating arcs, turning the patio itself into the gathering spot rather than whatever furniture you put on it.
The geometry draws people inward, which works well if you want the space to feel welcoming rather than merely functional.
More than half the bricks need precise cuts, and the pattern is not something I would tackle without prior experience or a mason’s help. The masonry sources call this one of the most time-consuming layouts you can choose.
What I would do instead: lay a simpler field of running bond or herringbone, then set a circular medallion or a single concentric ring as a central feature, getting the focal effect without the full labor hit.

The product is 7", High Performance Masonry Blade

Diamond Blade Specifications: each pack contains 5 diamond saw blades; The blades feature a 12" diameter, 0.12" thickness, and a standard 1" arbor, fitting most handheld machines and masonry saws; Included two 0.79" (20mm) bushings, with a total weight of 13.67 lbs (6.2kg), blade length 10mm; Equipped with pinholes;Ideal for contractors and serious DIYers who need to cut through standard concrete blocks, bricks, pavers, and stone

Wet Cutting without Dirt: VEVOR electric concrete saw provides a better cutting vision by avoiding the debris that spreads around in traditional cutting operations. Plus, it comes with a wet-cutting attachment, ensuring direct water spraying, eliminating the need for one-handed watering and cutting, and improving operational security.
5. Contrasting Brick Borders
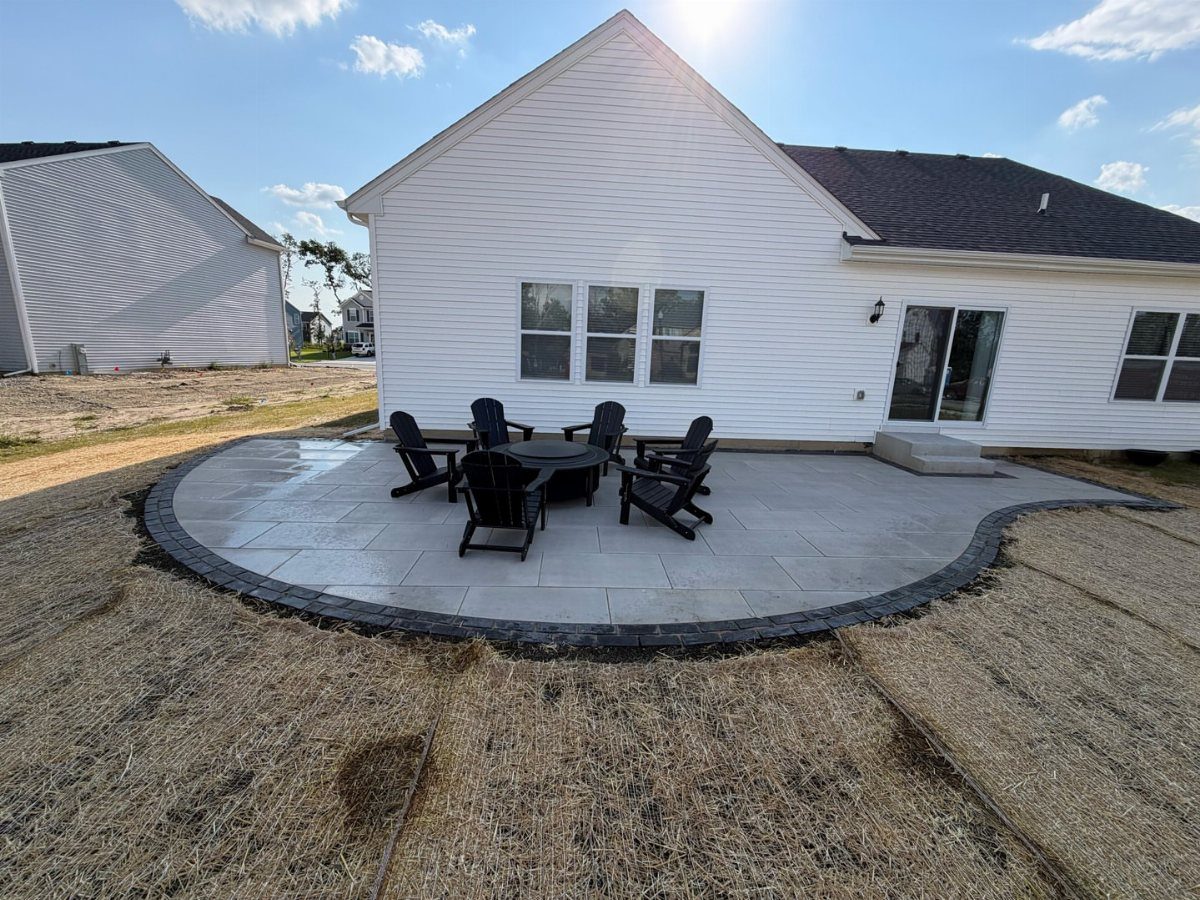
A band of darker or lighter brick runs the edge of your patio, or traces a curve through it, giving the eye something to follow and the layout a finished boundary.
A border on two opposite sides, or even just one, can frame the space without the cost and labor of running trim on every edge.
A border on 2 sides, or a single curved band, can define a seating area or separate the grill zone from the dining zone without the cost of edging everything.
The contrast can come from color, texture, or brick size; I would choose one variable and keep the others consistent so it does not turn busy.

The timeless & clean look of pavers, but with the durability and stamina of concrete. Tight-fitting common pavers in a herringbone layout. Great for indoor and outdoor applications. Mild texture and joints are perfect when surface texture and safety are a concern. Distinct v-shaped weaving pattern.
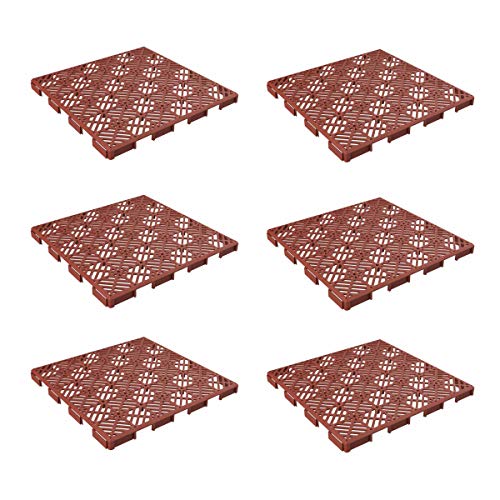
OUTDOOR PAVERS - This 6-pack of balcony flooring boasts a design that enables airflow and drainage for durability. Constructed from weather- and fade-resistant materials, these interlocking deck tiles won’t swell or decay and work well in direct sunlight.

The timeless & clean look of pavers, but with the durability and stamina of concrete. Tight-fitting common pavers in a herringbone layout. Great for indoor and outdoor applications. Mild texture and joints are perfect when surface texture and safety are a concern. Distinct v-shaped weaving pattern.
6. Mixed Pattern Layout
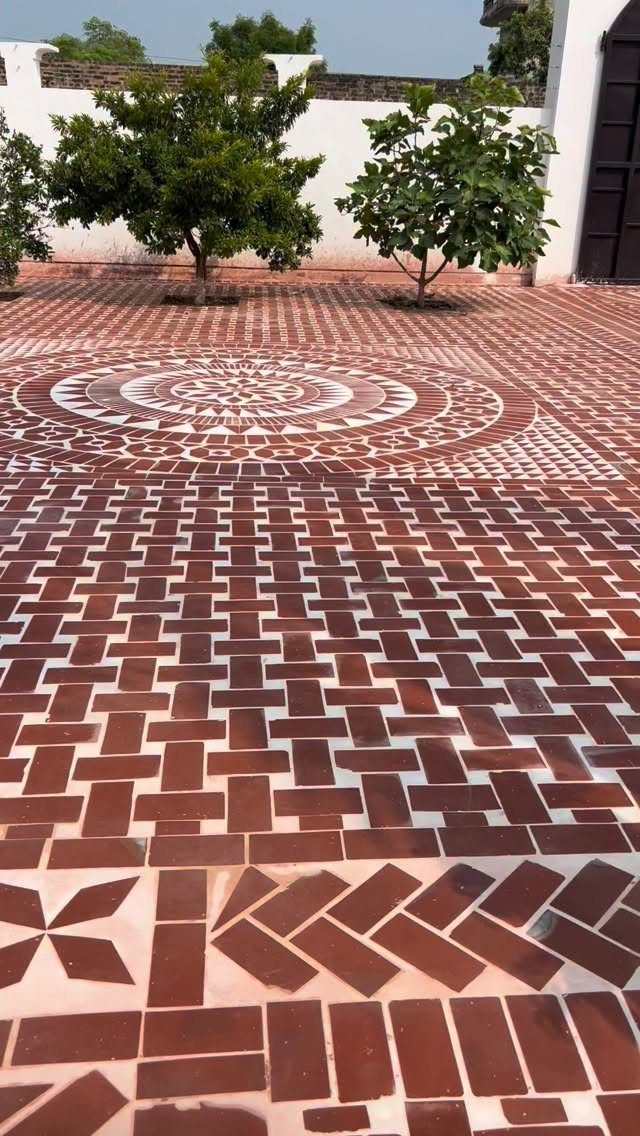
The combination asks for careful planning at the transitions, where one pattern has to resolve into another without ragged edges.
This is advanced work. The geometry of each section has to be calculated so the borders align, and any mistake in the first pattern compounds into the next.
If you want the look without the headache, I would choose one dominant pattern for most of the field and add a single contrasting medallion or border strip, the way you might use an accent tile in a bathroom.
The full mixed layout is beautiful; it is also the kind of project where paying for a mason’s layout time saves money over correcting your own misaligned field.

CONCENTRATED FORMULA: BrickTastic Is Shipped As A Powerful Concentrate. Use Straight For Heavy-Duty Cleaning Or Oil Stain Removal. Dilute With Water For Routine Cleaning. One Gallon Makes Up To 20 Gallons Of Cleaning Solution.

{ Fight Every Weather Condition } Whether it be rain, snow or excessive sunshine; Our sand is designed to handle the rigors of anything mother nature can throw at your patio!

Start rolling imprints long before stamps can be applied with the MARSHALLTOWN Rock 'N' Roller.
7. Built-In Tree Planter Cutout
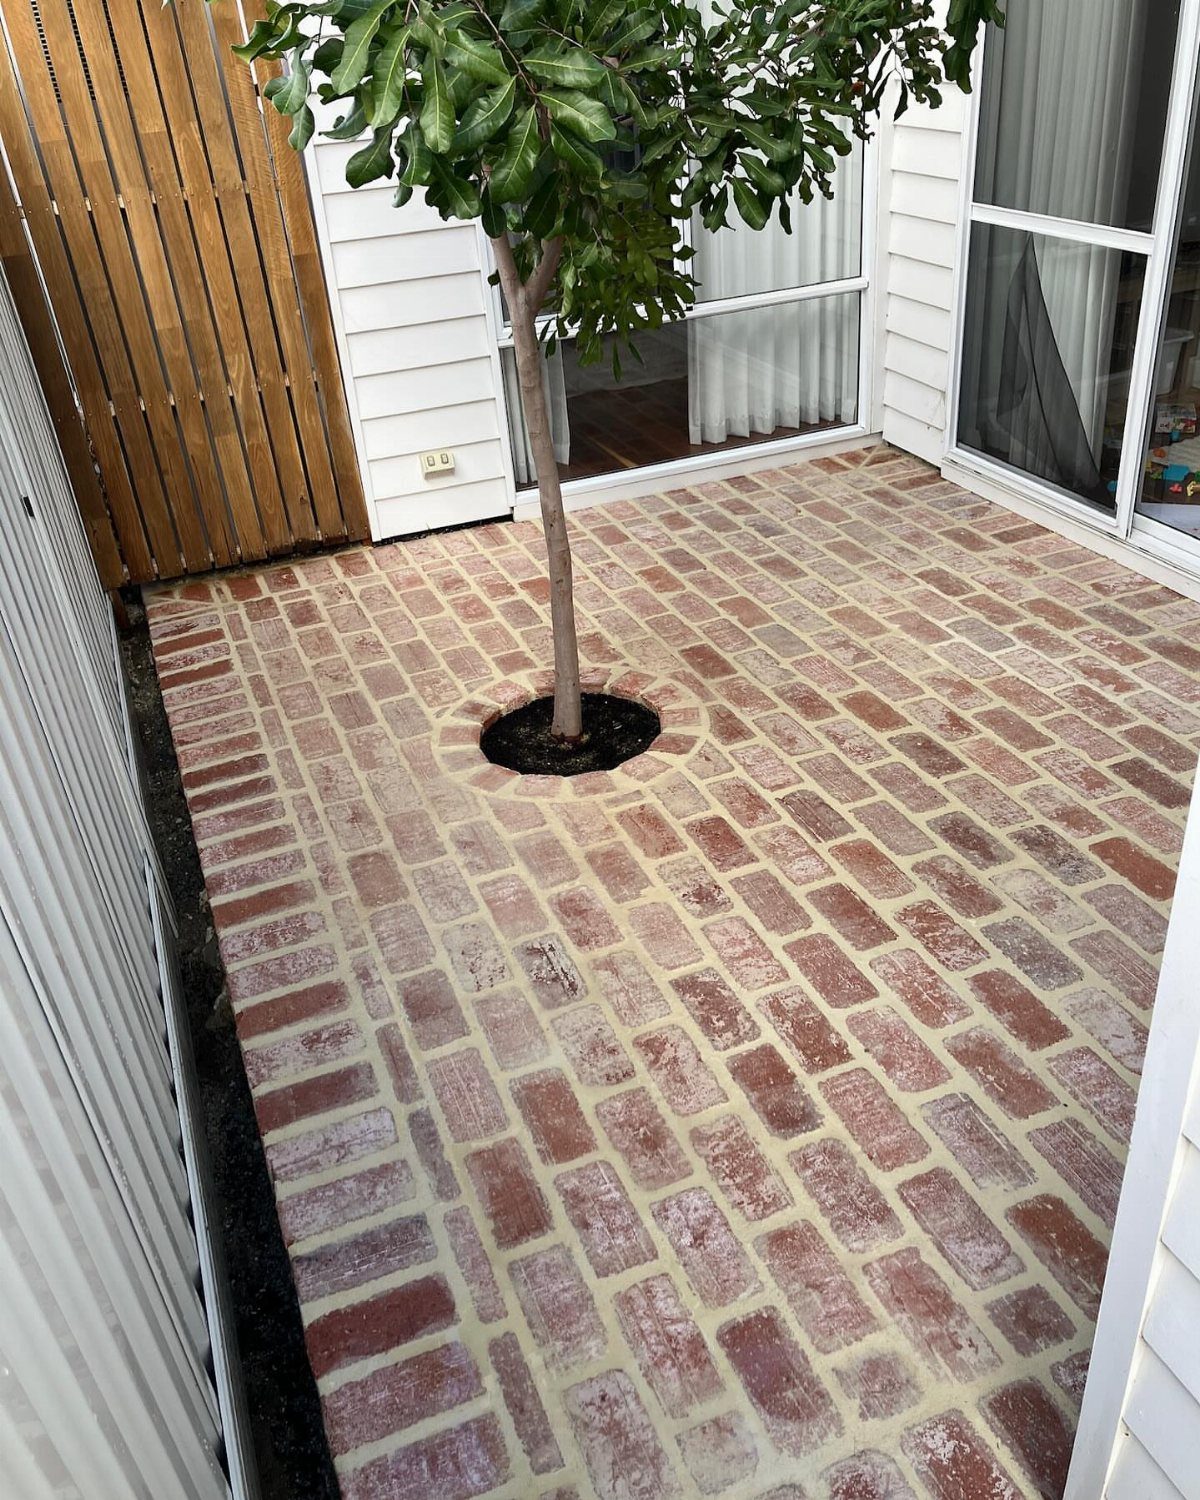
A circular gap in the brick field lets a tree grow through the patio itself, turning shade into a built-in feature instead of an obstacle to work around.
The cutout needs a retaining ring, usually steel or concrete, to keep the bricks from shifting as the trunk widens.
Leave enough clearance between the ring and the bark so the tree can still grow; anything tight against it will girdle the tree over time.
I would set the ring deep enough that lawn mower wheels or chair legs will not catch its lip.
This suits courtyards where a mature tree already stands, or where you are willing to wait for shade.
Maintenance is the downside: leaves fall on the brick, roots may eventually heave the edge, and you cannot simply relay the patio if the tree dies.
Check your species’ mature spread before you commit; a cutout that looks generous on a sapling turns cramped in a decade.

Combination of two styles: This stepping stone mold contains two styles: 10.2 inches round model and 11.8 inches square model. The cavity space of the mold is sufficient, which is suitable for the laying spacing of most courtyard trails, which can not only be neatly arranged, but also be mixed to create personalized pavement to meet the needs of diverse landscaping sizes.

Durable Steel Construction for Heavy Duty Cutting - Crafted with a strong steel body, 4'' diamond blade for grinder excels in dry and fast cutting. Its ultra-thin turbo design ensures precise, clean cuts with minimal dust, vibration, and debris.

Designed for Pressure Washers Only: This surface cleaner is designed for use with pressure washers. It cannot operate independently and is not for direct connection to standard garden hoses.
Choosing the Right Pattern
Size matters more than style when I am picking a pattern.
Small patios need simpler layouts; running bond or stack bond read cleanly without turning the floor into a busy quilt. Larger spaces can handle herringbone or basket weave because the repeats have room to breathe.
The house style is the other half of the choice. A modern exterior can carry herringbone or basket weave without looking forced, while traditional or rustic homes usually sit better with running bond.
I would match the brick to the existing lines of the house rather than fight them; a pattern that looks great in a photo can look wrong if it belongs to a different architectural language.
Personal taste is real, but it is not the only variable. I start with what the space can absorb, then narrow from there.

LSS diamond blades increase the density of diamonds and use higher-grade diamonds, which have high strength and are not easily deformed

【Ultrafast Cutting Performance】: This 10-inch diamond saw blade features advanced segmented design that delivers exceptional cutting speed through concrete, masonry, brick, block, pavers, and stone materials, significantly reducing your project completion time

【Professional Grade Construction】: This 10-inch diamond saw blade features a continuous turbo rim design that delivers smooth, chip-free cuts through the toughest materials including concrete, masonry, brick, block, stone, and pavers with exceptional precision and durability
Installation Methods
Brick patios install 2 ways: dry laid over sand and gravel, or mortared onto a concrete slab. Dry laid is the friendlier DIY route.
Bricks rest on a compacted bed, joints stay open or get swept with polymeric sand, and the whole surface flexes with freeze-thaw cycles without cracking. Repairs are simple; pop out one brick and reset it.
Mortared installation locks bricks to a concrete base with grout joints. The surface is rigid, the look is more formal, and any settlement shows up as cracked mortar rather than a loose brick.
Shape complexity drives the difficulty either way.
Straight edges and right angles keep the work moving. Curves, circles, and freeform outlines multiply cuts and slow the pace, which means more time or more money.

1 rigid decorative concrete stamp mat. Also available in sets - Just check our Amazon brand store! All concrete stamps will require the use of a release agent, either liquid or powder, to prevent them from sticking to the concrete.

Straight from a popular Chicago neighborhood, this redefined classic is tough to beat. Well-worn, textured masonry in herringbone layout. Slight brick undulations for authentic surface presentation.

Straight from a popular Chicago neighborhood, this redefined classic is tough to beat. Well-worn, textured masonry in herringbone layout. Slight brick undulations for authentic surface presentation.
Maintenance Tips
Sweeping is the first line of defense.
Leaves hold moisture against the surface, and dirt works into joints and grinds the faces. A broom every week or 2 prevents most of the slow wear.
Washing comes next.
A garden hose with a spray nozzle handles ordinary grime; a pressure washer works for deeper cleaning but needs a lighter touch than I would use on concrete. Harsh chemicals strip color and degrade sealers, so I skip them.
Sealing is optional but worth considering.
A quality sealant blocks moisture and resists stains from grill grease or spilled wine. Every few years is the usual interval; more often if the surface sees heavy use or stands under trees.
Cracks and damaged bricks need quick attention. In a dry laid patio, the fix is literal: lift the brick, level the bed, and relay it.
Mortared repairs take more skill, but small cracks filled early stay small. Left alone, water gets in and the damage spreads.

Brick Walk Maker

DEEP PENETRATING WATER REPELLENT — This ready-to-use penetrating concrete sealer soaks into porous concrete and masonry instead of sitting on top, helping reduce water and moisture absorption from rain, snow and seasonal weather. Ideal for concrete driveways, patios, sidewalks and other exposed surfaces where freeze-thaw stress is a concern.

【Edge Finishing】Specifically designed to conform perfectly to 90-degree angles, vertical slab edges, step risers, retaining walls, and tight perimeter borders.
Cost Considerations
Bricks alone run $2–3 per square foot. The full installed cost lands between $12 and $25 per square foot, which covers the base material, labor, sand or mortar, and edge restraints.
Pattern choice moves the needle on labor. Running bond in a rectangle is near the bottom of that range; herringbone, circles, or mixed layouts push toward the top because of cutting time.
Doing the work myself shifts the math. Rental tools and a weekend of my own time replace the labor line, but I still buy the same bricks and base material.
I would budget for extra brick beyond my measured area; cuts generate waste, and having a few spares beats a second trip to the yard.
Frequently Asked Questions
How much does a 20×20 brick paver patio cost?
A 20×20 patio is 400 square feet. Installed brick paver patios land in a wide range, and the per-square-foot math adds up fast once labor gets involved.
The pattern you choose moves that needle: running bond in a rectangle sits near the low end, while herringbone or any design with angled cuts pushes toward the top.
Can you lay bricks directly on dirt?
No. Bricks need a compacted gravel base topped with about 1 inch of sand, leveled smooth before laying begins.
The sand bed lets you tap each brick level and holds it steady; dirt alone shifts, drains poorly, and the bricks will wobble or sink within a season.
What are the most popular brick patio patterns?
Herringbone, running bond, and basket weave are the ones I see most often. Herringbone locks together tight and handles heavy traffic.
Running bond is the forgiving starter pattern. Basket weave breaks large spaces into smaller visual squares so the patio does not feel like a slab.