Garlic gardening success hinges on a single choice made before cloves ever touch soil: softneck for warm southern winters and long storage, hardneck where real cold arrives and richer flavor matters.
Planting depth has to change with soil type; a 2-inch standard that works in loam will rot cloves in heavy clay or leave them freeze-dried in sand.
I learned that after losing a row to Maryland clay before discovering the 1-inch rule for dense ground.
[link-whisper-related-posts]1. Softneck or Hardneck
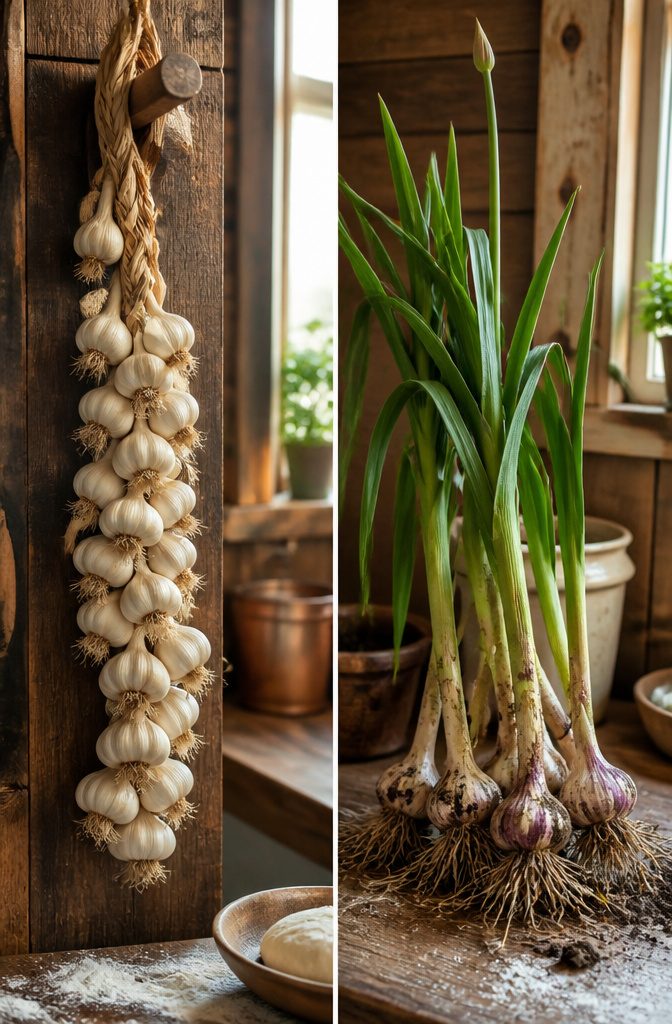
Softneck stores longer and braids neatly for the kitchen wall, which is why catalogs push it so hard.
Living where winters stay mild, that turned out to be the right call. Softneck handles southern heat better and the flexible stems let you weave a rope of bulbs that hangs through March if the house stays cool.
Up north, a hardneck garlic produces the sturdier plant. The stiff central scape shoots up in early summer and pinching it off sends energy back into making fewer, larger cloves with the deeper flavor people row over at farmers markets.
Those scapes cut young taste like scallions, and stir-frying them is the gardener’s consolation prize while the bulb finishes below ground.
Flavor range runs mild to sharp inside either type, so trying two or three varieties covers most tastes without much extra effort.
Elephant garlic belongs in this conversation only as a warning: it is not true garlic but a leek relative. The cloves grow oversized and the taste stays mild to the point of bland.
For someone after real garlic punch, skip it; for a nervous cook who finds standard cloves too sharp, the size makes it easy to handle even if the flavor never quite arrives.

WHAT YOU WILL RECEIVE: You will receive 4 garlic bulbs for planting in both hardneck and softneck variety (Music Garlic, Chesnok Red Garlic, Early Italian Garlic, and Purple Stripe Italian Garlic)


Built for the grower who knows hardneck from softneck and braids the crop to hang in the pantry Know Your Garlic.
2. Soil That Garlic Actually Wants
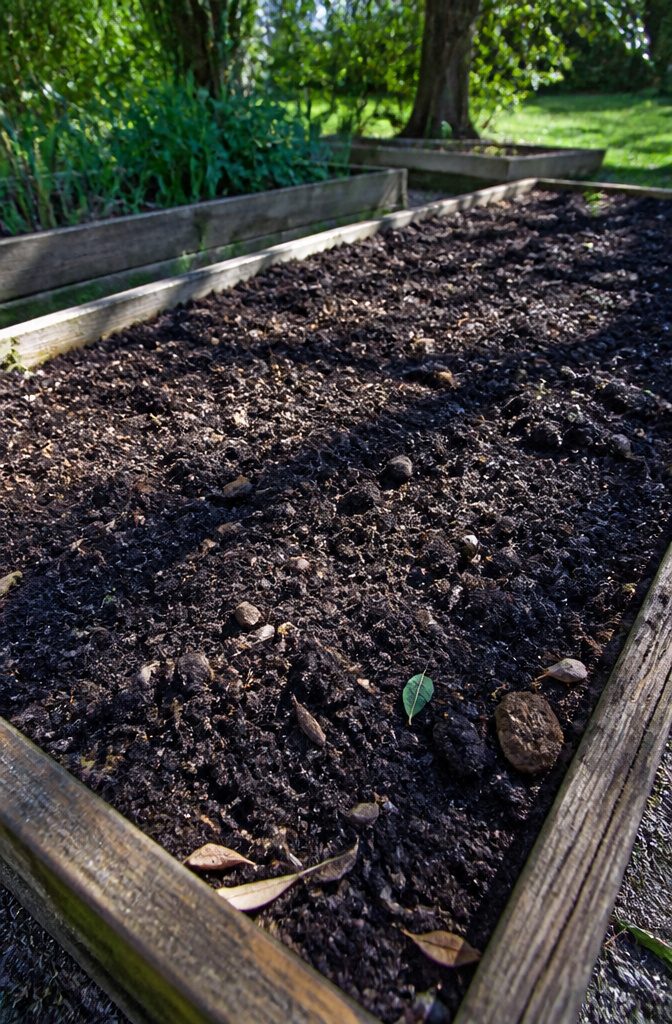
Garlic roots rot fast in soil that holds water like a sponge, so drainage comes first.
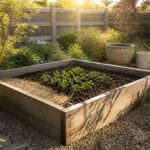
A raised bed fixes heavy clay without much fuss, and working compost through the top few inches of any bed keeps the texture open enough for bulbs to swell.
The pH wants to sit between 6.0 and 7.0; anything more acidic and the plant locks up nutrients it needs.
This is a heavy feeder, especially hungry for phosphorus to push root development early. A soil test saves guessing.
If phosphorus reads low, 10-20-10 at 1 pound per 100 square feet covers the gap. No test in hand?
Bone meal works as an organic fallback. Either way, mix it in at planting rather than dusting the surface, because garlic feeds from the zone where roots first spread.
Bold, Rich Flavor: Known for their robust, spicy taste that intensifies when cooked—perfect for roasting, sautés, and garlic-infused oils.

A great tasting healthy. Heirloom, Non-GMO

Large, Firm Garlic Cloves for Planting. Each bulb produces thick, well-formed garlic cloves that separate cleanly. Customers consistently mention the firm texture and size, making these garlic seeds for planting easy to handle and space evenly.
3. Planting Depth by Soil Type
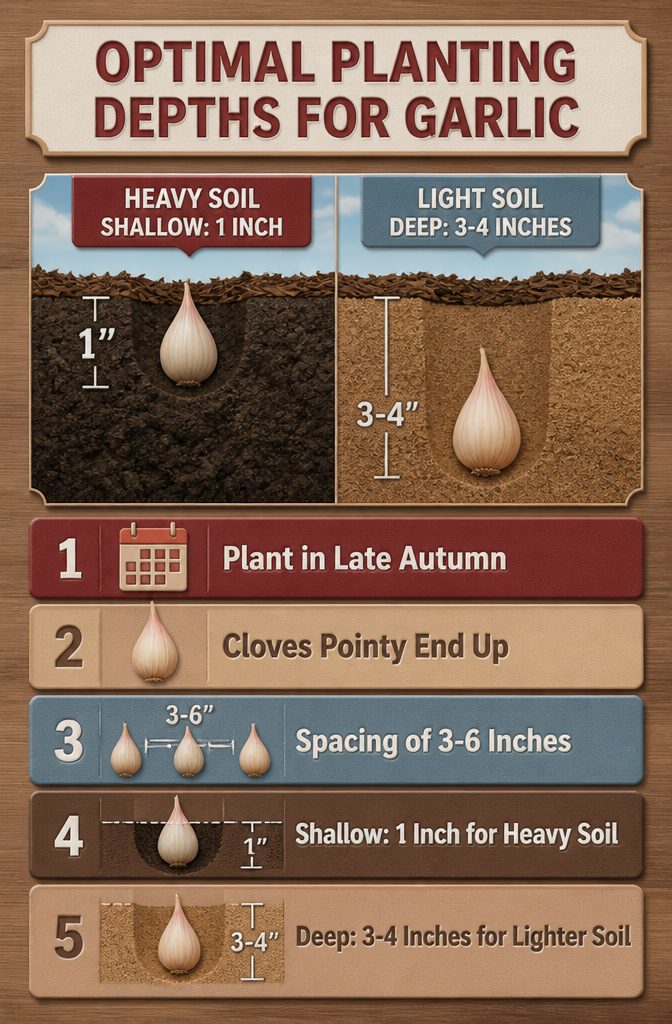
Late autumn is the window for getting garlic cloves into the ground, ideally before the first hard frost so roots have time to establish.
Each clove goes in pointy end up, root end down; getting this wrong leaves the bulb struggling to reorient itself through a whole season.
Spacing runs 3–6 inches apart within rows, with rows set 12–30 inches apart depending on how much room you have to work with.
The part that tripped me up early on was depth. Heavier soils need shallower planting, around 1 inch, while lighter, sandier soils want cloves buried 3–4 inches deep.
The logic is simple: dense clay holds moisture longer and can rot a clove sitting too deep, where loose soil drains fast enough that a shallow clove risks drying out or heaving in freeze-thaw cycles.
I started in raised beds filled with imported loam and planted at 2 inches for years before realizing my native clay corner of the yard needed a completely different approach.
Maryland guidelines suggest a 5-inch furrow with 1–2 inches of soil covering the clove, which works for typical garden loam; Johnny’s recommendation of 3–4 inches covers the light end. Mulch on top evens out the temperature swings either way.

Feed your raised bed for up to 3 months

Ready-to-Use Formula: No mixing or extra steps required. Simply pour and plant - perfect for gardeners of all experience levels.

Pack of 2 Raised Garden Bed- Add a new level of convenience to your gardening experience with the Galvanized Raised Garden Bed. Enjoy expanded yield and a more assembled garden layout with this garden accessory, each sized at 48 Inches x 24 Inches x 12 Inches.
4. Water Through Spring, Then Stop
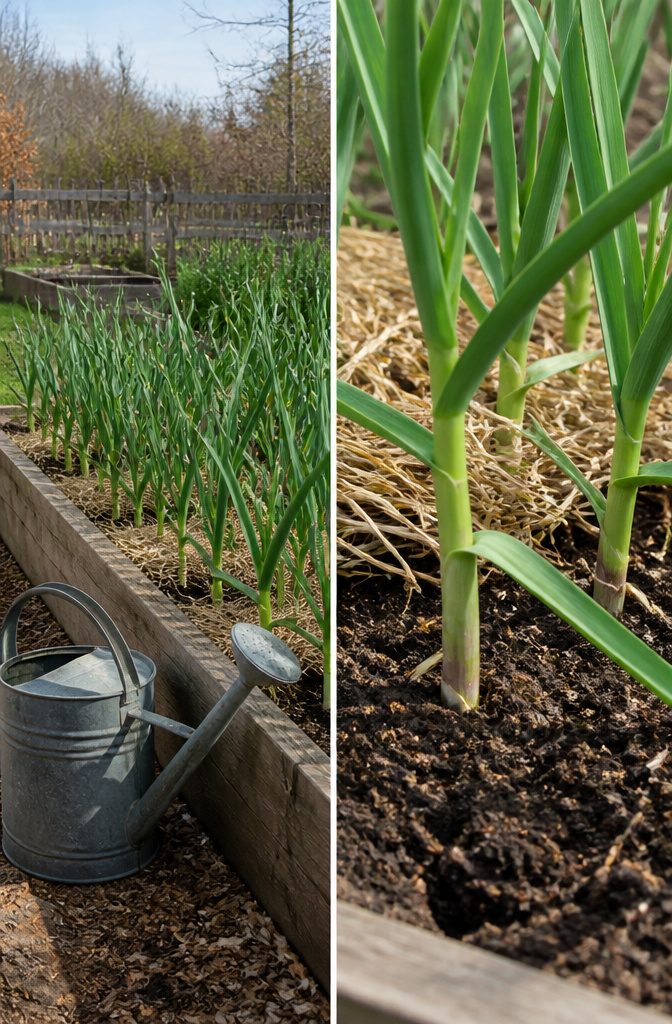
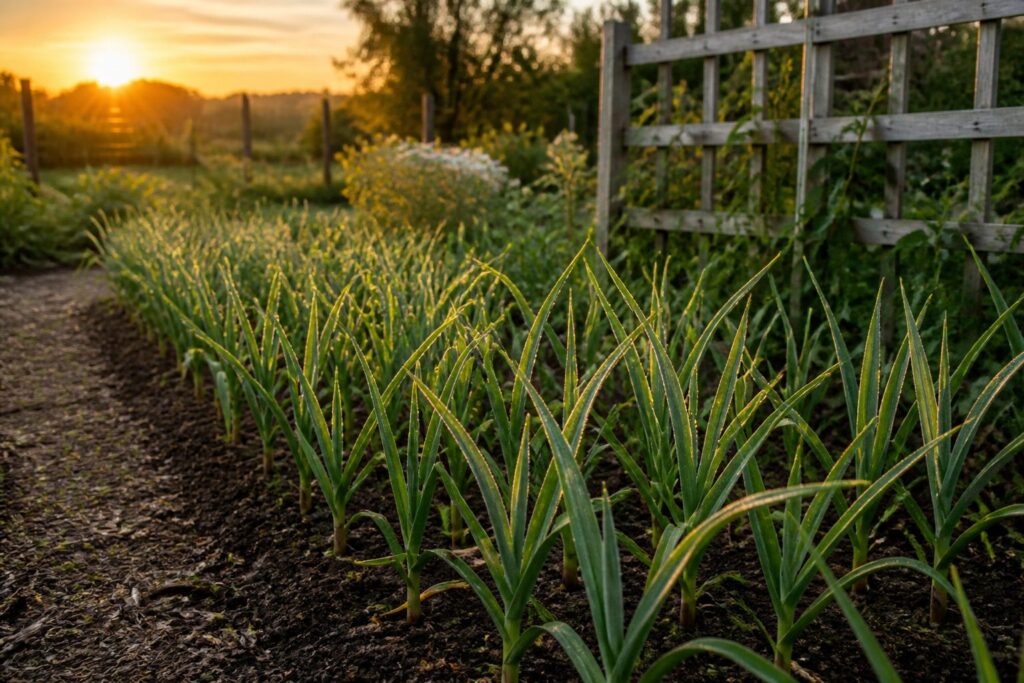
Spring growth is the only window when garlic wants steady water. The bulbs are sizing up underground, and dry spells then cost you real size at harvest.
I water deeply once a week if rain falls short, checking the soil a few inches down with my finger rather than trusting the surface.
The leaves tell you plenty: floppy, pale growth means thirst, while firm upright stalks signal you’re on track.
As the lower leaves start yellowing and the bulbs push toward maturity, the same moisture that grew them becomes a liability.
Wet soil late in the cycle invites rot, and garlic in soggy ground can turn to mush before you notice. I taper off through late spring, letting the top inch dry between any supplemental waterings.
A layer of mulch right after planting in fall does two jobs at once.
It suppresses the weeds that would compete for water through winter, and it holds enough moisture in the soil that spring watering starts from a better place.
Straw or shredded leaves work; skip anything that mats too densely or you’ll trap too much wetness against the neck.
Stop watering entirely two to three weeks before you plan to pull bulbs; the papery wrappers need dry conditions to cure properly in the ground.

STRONGER ROOT DEVELOPMENT: Bone Meal is a natural source of vital, readily available organic nitrogen, phosphorus and calcium that promotes strong plant roots, vibrant blooms and more delicious vegetables. Helps to enhance your plants throughout the growing season!

High Phosphorus Content (4-12-0): Boosts root growth, flower formation, and fruit set.

Down to Earth Bone Meal is a five pound box of all natural fertilizer with 3-15-0 formula and is listed by the Organic Materials Review Institute (OMRI) for use in organic production
5. Cut the Scapes
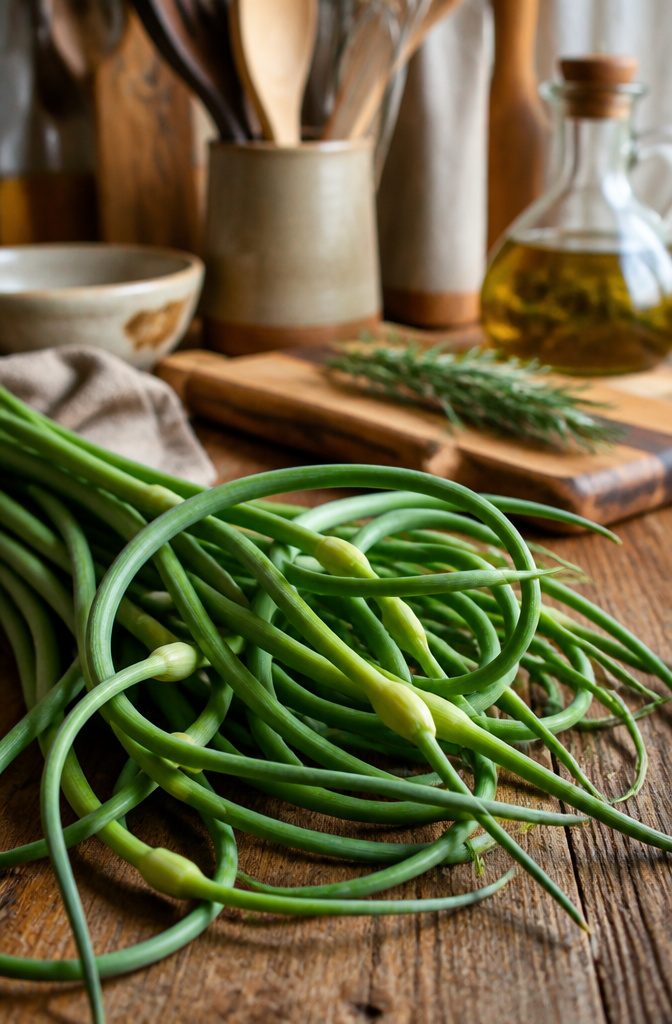
Hardneck garlic sends up a flower stalk called a scape, usually sometime in May or early June, about a month or two after the first leaves appear.
The stalk starts straight, then curls into a loop or two as it lengthens. Cut the scape when the curl reaches anywhere from half to full curl and the tip is still tight, not opened into a flower head.
This redirect matters.
The plant will keep trying to feed that stalk unless you stop it, and every bit of energy going upward is energy not going into the bulb underground. Most growers cut for larger bulbs.
A few leave scapes on deliberately, either for the small, round bulbils that form at the tip, those tiny cloves you can replant or let drop for a self-seeding patch, or for actual seed breeding.
That last route is only worth it if you have space to spare; in a small bed, volunteer garlic becomes a weed that crowds everything.
The cut stalks are not waste. They carry a sharp, green garlic heat that softens with cooking.
Small, young scapes are tender enough to eat like asparagus. Thicker ones need a quick sauté in oil and salt, a turn on the grill, or a blitz into pesto that freezes well in jars for winter.
I freeze most of mine that way; the bright green paste works on pizza, pasta, eggs, anything that wants a hit of garlic without the cloves.

PRODUCT NAME: Laba garlic Flavor: garlic, sweet vinegared garlic, honey pickled garlic

Premium Quality Garlic: Sanniti Pickled Garlic Cloves are carefully selected and preserved in oil to maintain their fresh, robust flavor and tender texture.

Used traditionally for cardiovascular health, immune health and stamina
6. Harvest When Lower Leaves Brown
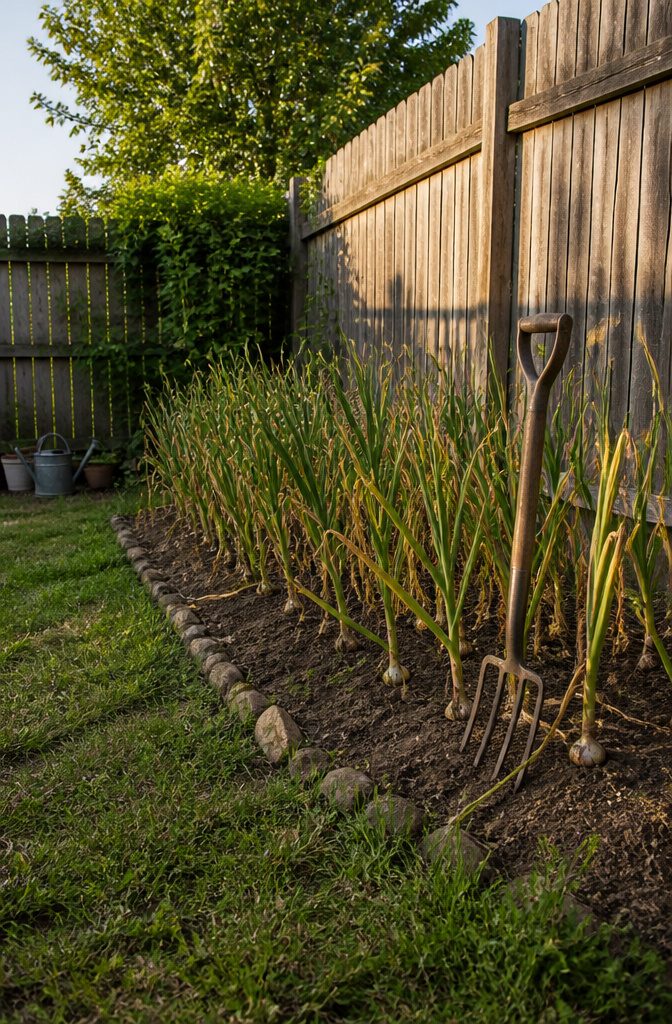
The lower leaves on your garlic stalks will start to yellow and dry in early summer, and that shift is your signal.
Harvest when the bottom three to five leaves have turned brown but five or six leaves above them are still green.
Wait too long and the bulbs separate in the ground and rot; pull too early and they have not sized up.
A spading fork or undercutter works better than yanking from the top. Bruised bulbs do not store, so dig a few inches out from the row and lift the whole plant gently.
Brush off excess soil right there in the garden, but do not wash them. Water on the surface invites rot during curing.
Cure the garlic in a warm, shady spot with steady air movement. A barn, garage, or attic works; spread the bulbs in a single layer on screens or tie them in loose bundles to hang.
Do not aim a fan straight at them, and keep them out of direct sun and out of a greenhouse.
The necks will dry and the outer skin will turn papery in about two to three weeks. Only then do you trim the roots and cut the tops.

Garlic prefers well-drained soil and a sunny spot with at least 6 hours of sunlight per day.

Built for the grower who knows hardneck from softneck and braids the crop to hang in the pantry Know Your Garlic.

7. Store Cool and Dry, Never Cold
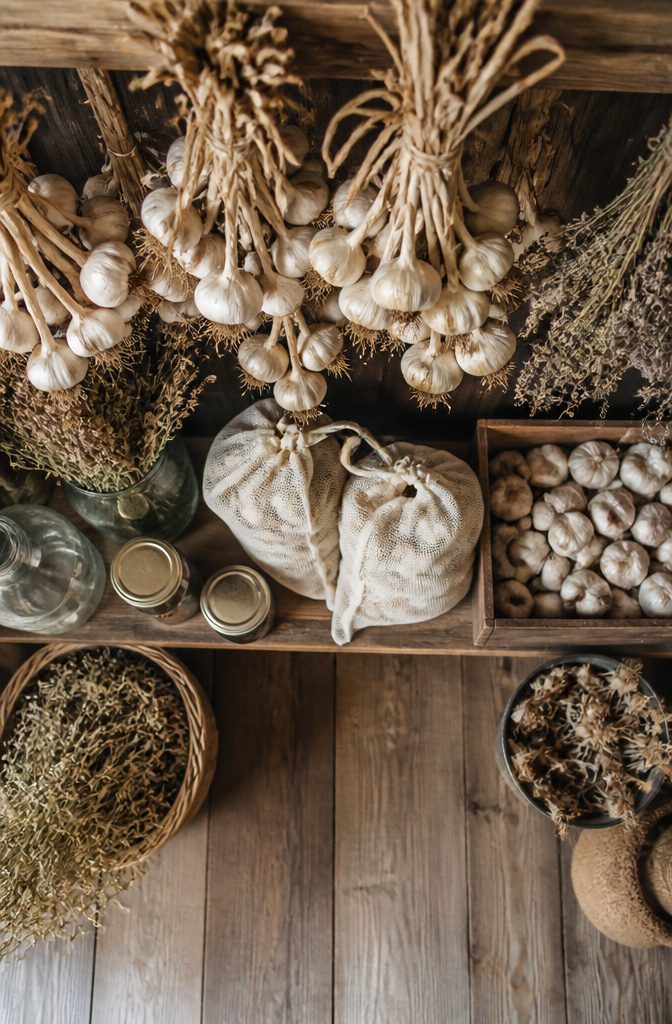
Cured garlic bulbs need cool, dry air around them, but refrigeration ruins the whole crop.
The cold triggers sprouting, turning firm cloves into green shoots within weeks. That mistake cost me a whole braid two seasons back.
45°F to 55°F with humidity around 50% to 60% is where garlic keeps best.
Mesh bags or open containers stacked one or two layers deep let air move through without trapping moisture. Braided softnecks hang well in a basement corner or ventilated closet.
Storage life splits hard along the neck type. Softneck varieties keep six to twelve months with their multiple papery wrappers.
Hardnecks, with their tighter central stem and fewer outer layers, usually last three to six months before quality drops. Plant hardneck if you love the flavor, but eat it first.


A great tasting healthy. Heirloom, Non-GMO

Great for Culinary Use in the Kitchen and for Planting and Growing Garlic
Garlic in Pots
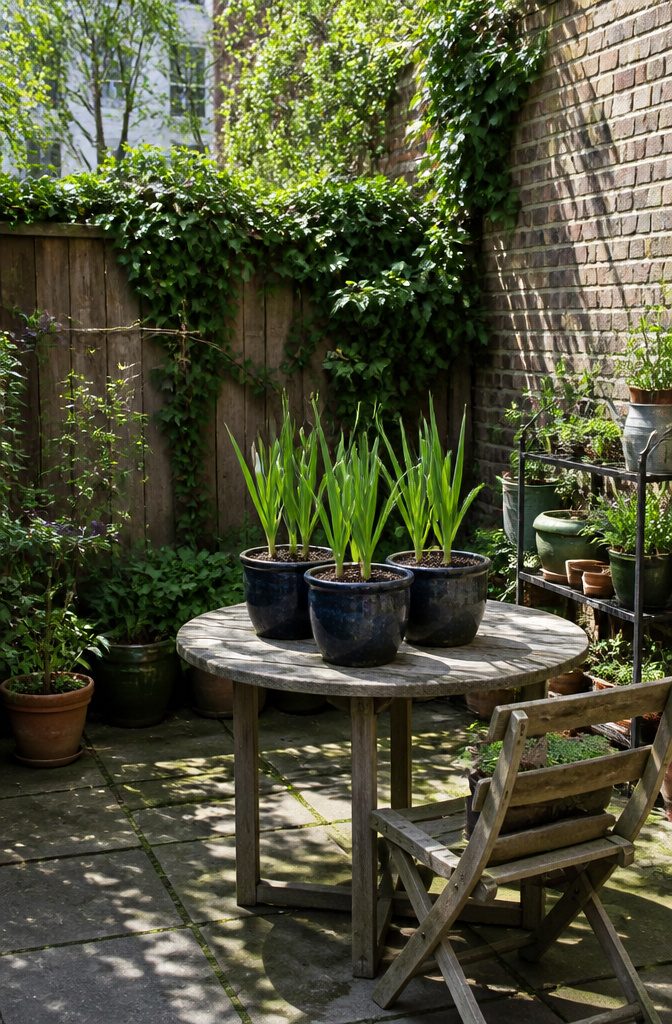
Container garlic is how I got my first crop, back when a rental patio was the only ground I had.
Any pot needs to be at least 8 inches deep with real drainage holes, not the one dimple most decorative planters leave in the center.
I drilled extras in a stubborn ceramic pot once and the cloves rotted anyway because the mix held too much water.
Standard garden soil turns to concrete in a container; a quality potting mix with actual perlite or bark keeps the roots breathing through winter.
Expect smaller bulbs than in-ground plantings. Three cloves fit a 20 cm-wide pot, five or six in a 30 cm one, and each will give you a usable head rather than a supermarket giant.
Water more often than you would for garden garlic; pots dry from all sides and a hard freeze can freeze-dry the roots if the soil is already desiccated.
Owners on Reddit mention hauling containers into sheltered doorways or against south walls when temperatures plunge below the teens, and that move saved my own crop more than once.
Feed with something high-nitrogen once spring growth starts, then stop by mid-May so the plant shifts to bulbing instead of leaf.
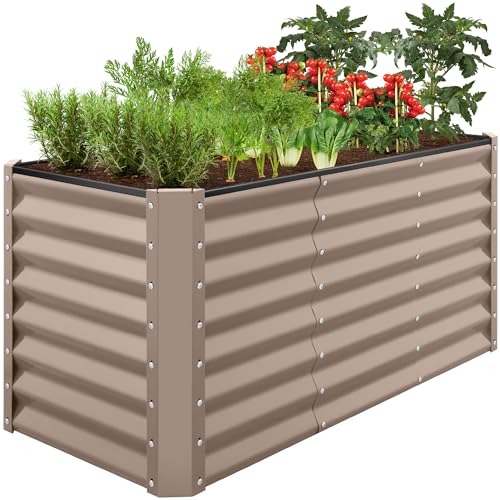
2FT GROWING DEPTH: 24 inches of depth holds up to 119 gallons of soil-ideal for medium to deep rooting plants and vegetables like broccoli, beans, and more. Note: This product does not include a bottom panel

Upgraded Durability and Structure: The average thickness of this galvanized corrugated steel garden bed reaches 0.67 mm, and the thickest part can reach 1.2 mm, Multi-screw reinforcement prevents deformation and can be reused for many years

Upgraded Durability and Structure: The thickness of this galvanized corrugated steel garden bed reaches 0.67 mm, and the thickest part can reach 1.2 mm, Multi-screw reinforcement prevents deformation and can be reused for many years
What to Watch For
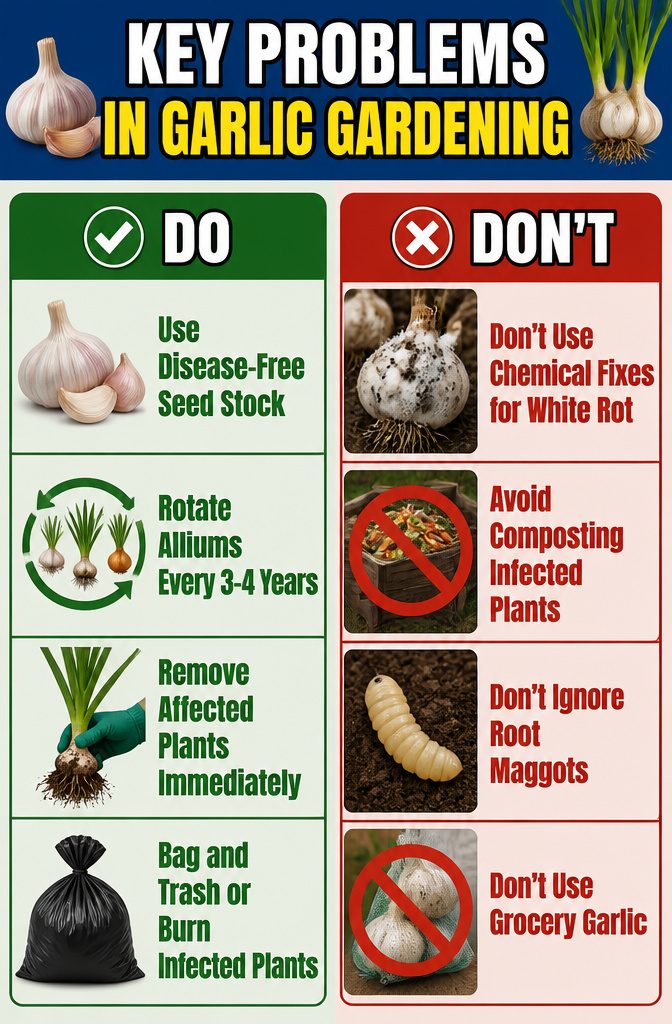
Garlic mostly minds its own business, but two problems still show up in home gardens.
White rot hides in the soil for years, so the first warning is usually yellowing leaves right when you expect them to dry down for harvest.
Dig anyway. A white fluffy fungus at the bulb base with tiny black specks means the whole allium bed is compromised, and there is no chemical fix for white rot in a home garden.
Pull every affected plant, bag it for the trash or burn it, and keep it out of the compost where spores survive and spread on tools, boots, and trowels. Root maggots are the other headache.
They tunnel through cloves underground and leave rot behind. Certified disease-free seed stock is the first defense, bought from a reputable source rather than planted from grocery cloves that can carry infection without showing symptoms.
After that, rotate alliums on a strict 3–4 year cycle before garlic or onions return to the same soil.
The rotation length matters: shorter gaps let soil-borne disease build, and by the time you see damage the bed is already spoiled for seasons to come.

HELPS CORRECT PHOSPHORUS DEFICIENCIES: Amend nutrient-deficient soil with high-phosphorus 6-8-0 NPK bone meal plant food to help plants grow and develop roots
FOR USE ON: Use Bone Meal organic fertilizer for all bulbs both Spring and Fall as well as annual and perennial flowers

GROW THROUGH EVERY STAGE: For all stages of plant growth and flowering, this fertilizer provides phosphorus necessary to support development from early planting through bloom time
Six Varieties Worth Naming
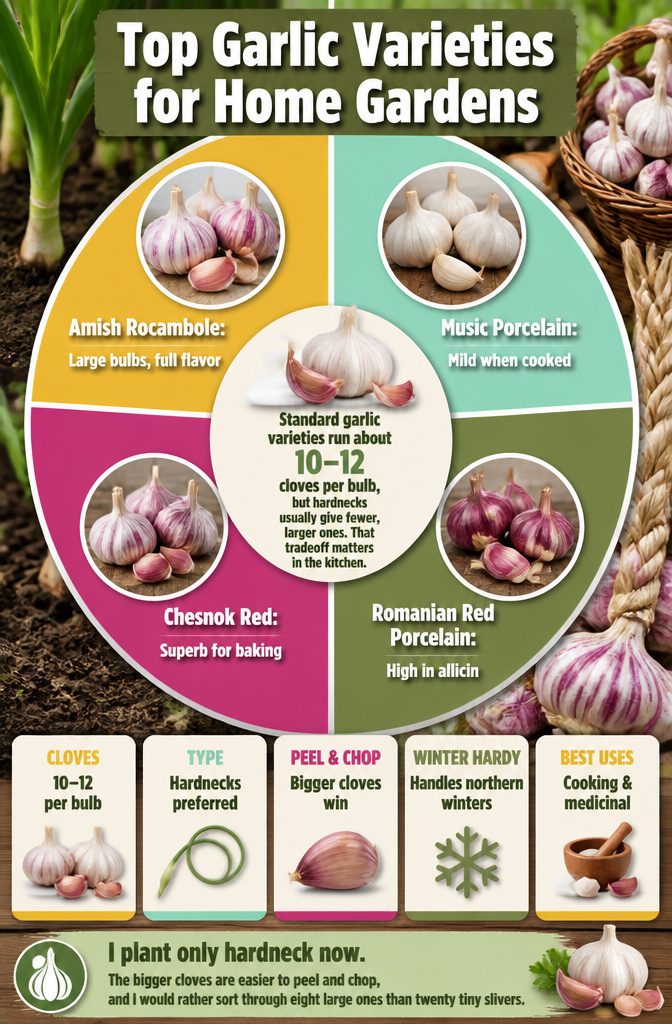
Standard garlic varieties run about 10–12 cloves per bulb, but hardnecks usually give fewer, larger ones. That tradeoff matters in the kitchen.
- Amish Rocambole handles northern winters without fuss. The bulbs grow large, and the flavor runs deep and full-bodied with medium heat.
- Music Porcelain is the easy keeper of the group. Raw, it bites hard; roasted or baked, it turns mild and almost sweet.
- Chesnok Red, a Purple Stripe heirloom, carries rich all-purpose flavor. Sources single it out as a superb baking garlic; the skins hold mottled color that looks good braided.
- Romanian Red Porcelain runs highest in allicin among the common choices. The heat is intense, the tang lingers, and it is the one to grow if you want garlic for medicinal use.
I plant only hardneck now. The bigger cloves are easier to peel and chop, and I would rather sort through eight large ones than twenty tiny slivers.

🔥 Authentic Italian Garlic – Whole cloves marinated in oil & herbs for a bold, savory taste.

Premium Himalayan Single Clove Garlic – Whole solo garlic bulbs sourced from the Himalayan region of India.

PREMIUM VARIETY: Non-GMO garlic bulbs specially selected for planting, featuring large, healthy cloves perfect for garden cultivation
Softneck Against Hardneck
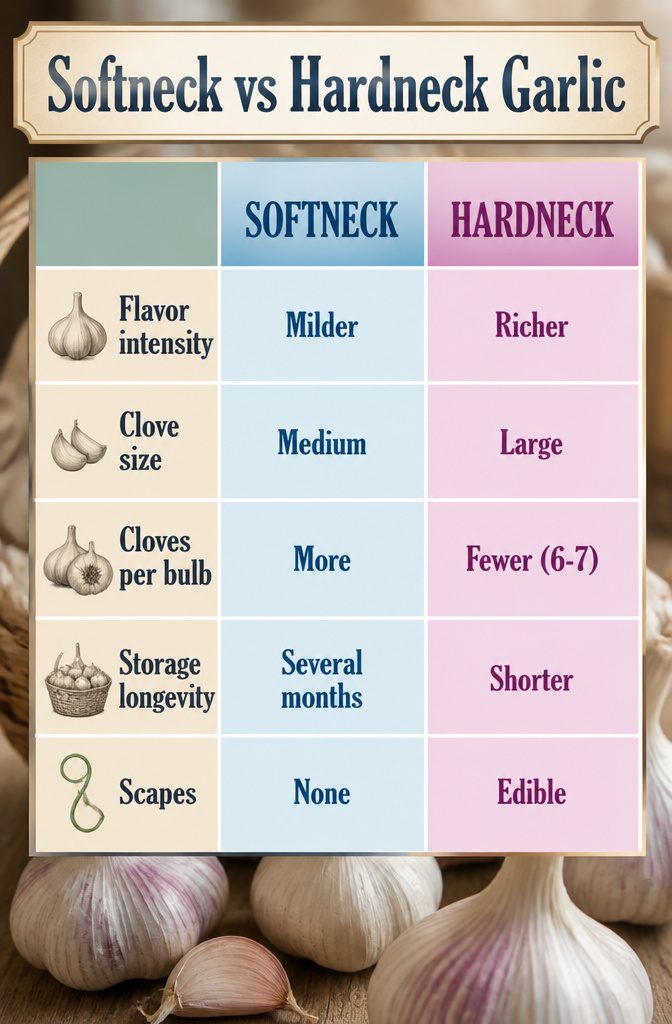
What looks prettiest in the catalog matters less than whether you are buying softneck or hardneck.
Softneck and hardneck are not two flavors of the same thing. They are different plants with different demands, and picking wrong means a disappointing harvest before you even start.
Softneck garlic, the kind stacked in grocery store bins, produces more cloves per bulb, though the individual cloves run smaller, especially in those inner layers.
The flavor stays milder, which some cooks prefer, and the bulbs store for several months if you keep them cool and dry.
Warm-climate gardeners should reach here first; softneck handles southern heat without the cold requirement hardneck demands. The soft stems also let you braid the foliage into those traditional hanging strings once the bulbs cure.
Hardneck garlic sends up a rigid central stalk called a scape.
Pinch it off in late spring to push energy back into the bulb, then chop and use it like a scallion. Hardneck gives larger outer cloves, no tiny inner ones, and richer, more complex flavor.
But the bulbs do not keep as long, so eat those first. Hardneck needs real winter cold to bulb properly, making it the northern gardener’s default choice.
| Attribute | Softneck | Hardneck |
|---|---|---|
| Flavor intensity | Milder | Richer, more complex |
| Clove size | Medium outside; small inner cloves | Large outer cloves; no inner cloves |
| Cloves per bulb | More | Fewer (typically 6–7) |
| Storage longevity | Several months | Shorter; use first |
| Scapes | None | Edible; remove to increase bulb size |
| Climate preference | Warmer | Cold winters required |
If you are in a borderline zone like Arkansas, either can work. I would still plant hardneck if your winter dips below freezing reliably, softneck if you are gamble-planting in a mild year.
What 10 Feet of Row Yields
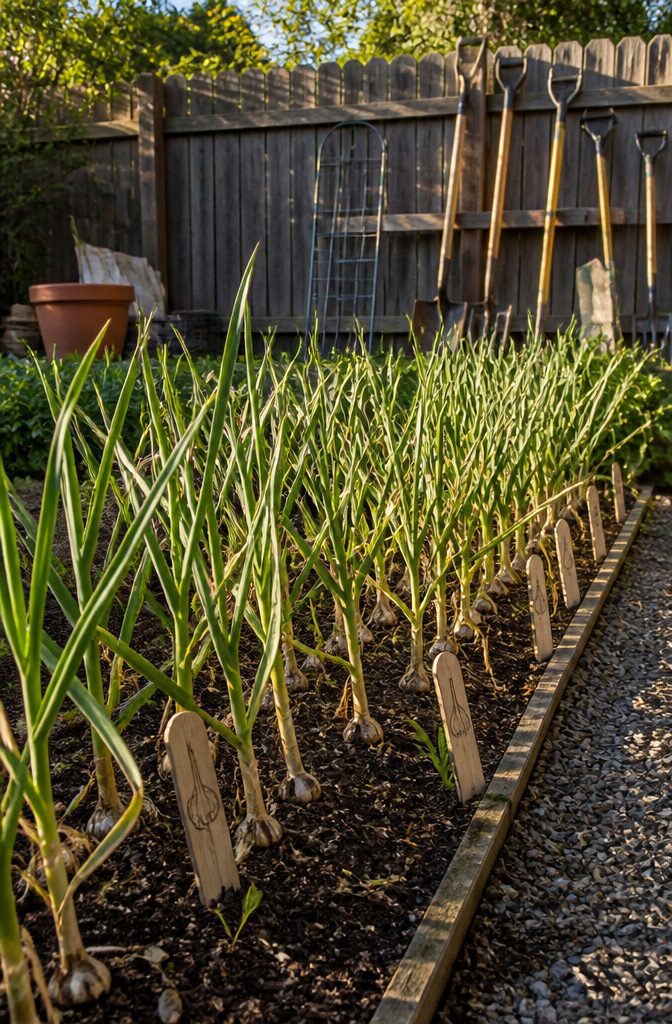
A 10-foot row of garlic, planted at the spacing most guides recommend, gives 5 to 9 pounds at harvest. That range is wide enough to matter when you are deciding how much to plant.
Hardneck varieties run toward the lower end, since they produce fewer but larger cloves per head, typically 5 to 8 and sometimes 10. Softnecks crowd more cloves into each bulb, often up to 18, so the same row length can weigh in heavier.
Homegrown garlic takes up little space and requires little effort to get a good harvest.
The "little space" part is worth taking literally.
If you are working a small rental plot or a first home’s side yard, a single 10-foot row is enough to keep two moderate cooks in garlic for months. Scale from there.
Frequently Asked Questions
When is the best time to plant garlic?
Late autumn is the best time to plant garlic, ideally before the first hard frost so roots can establish.
In Arkansas, the window runs from October through mid-January, though earlier planting gives cloves more time to develop properly. Spring plantings produce smaller bulbs because the cloves miss the cold period that triggers bulb enlargement.
How deep should I plant garlic?
Plant garlic cloves 1 to 4 inches deep depending on your soil type.
Heavy clay soils need shallower planting at about 1 inch, while light sandy soils want cloves 3 to 4 inches down. For typical garden loam, 1 to 2 inches of soil over the clove works well.
How do I know when garlic is ready to harvest?
Harvest garlic when the bottom three to five leaves have turned brown but five or six leaves above them are still green.
Waiting too long lets bulbs separate and rot in the ground; pulling too early means they have not finished sizing up. Early summer is typical, once the lower half of the foliage starts yellowing.
Can you plant garlic in pots?
Yes, garlic grows well in containers at least 8 inches deep with real drainage holes.
Use a quality potting mix with perlite or bark rather than garden soil, which turns concrete-like in pots. Expect smaller bulbs than in-ground plantings; three cloves fit a 20 cm-wide pot, five or six in a 30 cm one.
Should I cut off garlic scapes?
Cut hardneck scapes when the curl reaches half to full curl and the tip is still tight.
Removing the scape redirects energy from the flower stalk back into bulb growth, giving you larger cloves. The cut stalks are edible and carry a sharp, green garlic heat that works in pesto, stir-fries, or grilled.
Can you eat garlic leaves?
Young scapes are tender enough to eat like asparagus, while thicker ones need cooking.