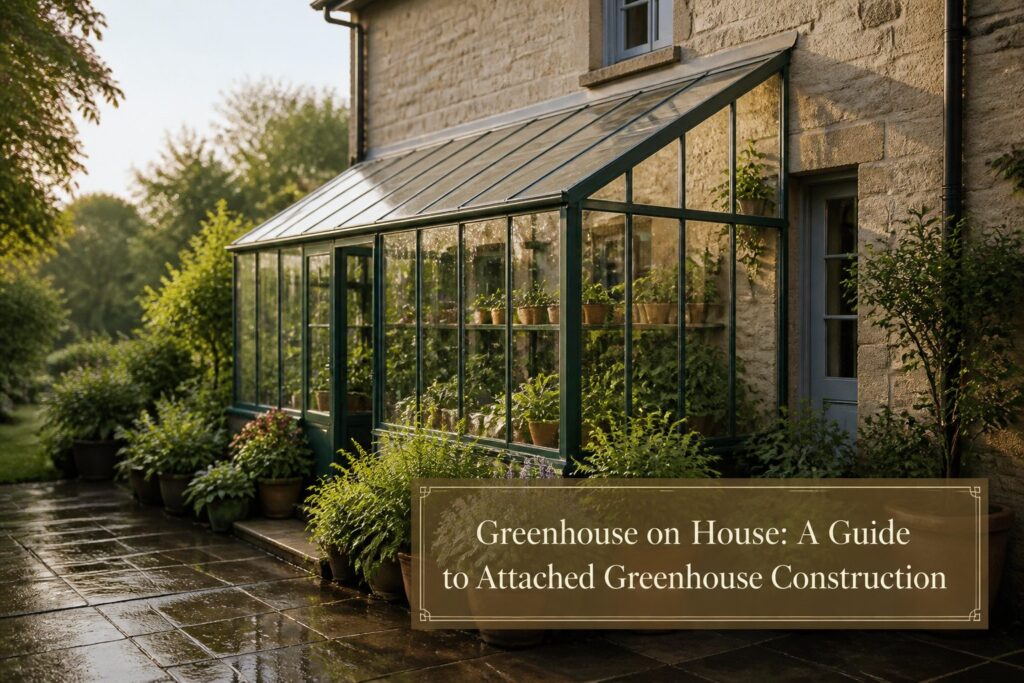
A greenhouse on house is a lean-to structure built against an exterior wall, sharing that wall to cut construction costs by 20 to 30 percent.
That moisture gets trapped against your home’s framing, which is why the vapor barrier behind the shared wall matters as much as any glass you install.
My own build used a south-southwest wall that was not perfectly oriented but had the longest run and the most exposed foundation, and the first hard lesson was that the house wall needs weatherproofing equal to any exterior wall facing open rain.
[link-whisper-related-posts]Location and Orientation
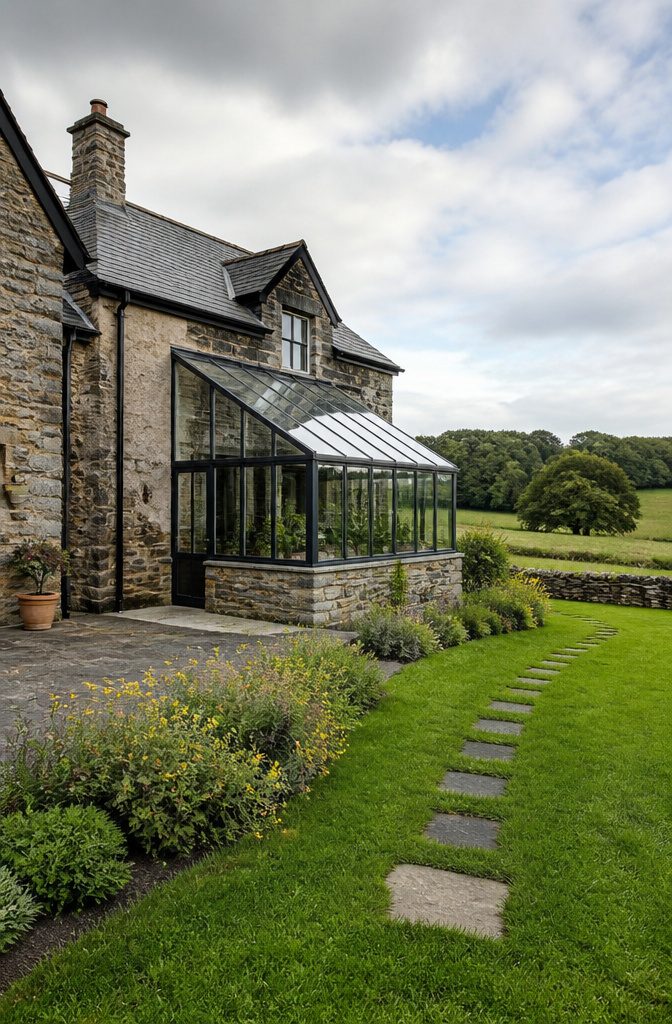
The wall you choose is the first decision that shapes everything after it.
South-facing walls are ideal in most climates because they catch direct sunlight through winter when the sun sits low, then get less overhead exposure in summer when overheating becomes the problem.
My own house doesn’t align perfectly north-south, so I had to work with what was there. The south-southwest wall won because it was the longest run, had the most exposed foundation, and still got decent sun.
A wrap-around corner greenhouse crossed my mind, but the slight extra exposure didn’t justify the cost for the space I’d actually use.
Wind protection matters as much as light. Tucking the greenhouse against the main wall blocks prevailing winds you might otherwise spend money fighting.
Accessibility is the third piece: you’ll walk out there in bad weather, so the route from your kitchen or mudroom should be short and sensible.
Look at what already exists on that side, too. A cellar bulkhead or small basement window can become an access point and help air circulate between house and greenhouse without extra ductwork.

FULL CRAWL SPACE ENCAPSULATION KIT (UP TO 1,200 SQ. FT.) – All-in-one bundle designed to completely seal crawl spaces. Includes everything needed for a professional-grade installation without the cost of hiring a contractor.

COMPLETE CRAWL SPACE ENCAPSULATION KIT – Covers up to 2,000 sq. ft. and includes 12 & 20 mil woven vapor barrier, vapor barrier seam tape, butyl tape, professional-grade sealant, and installation fasteners for a full moisture control system.

HEAVY-DUTY VAPOR BARRIER – Black and White Panda Film is a heavy-duty poly film. Made of 100% virgin poly materials. Thickness: 10Mil Width:10FT Length: 98FT. Fully deployed 10 'x 98' covering 980 square feet. Our rolls of Black and White Panda Film plastic sheeting are strong and durable, they will not tear or rip easily. Useful as your crawl space encapsulation material, painter's tarp, vapor barrier, or anything you want to cover and protect.
Foundation and Materials
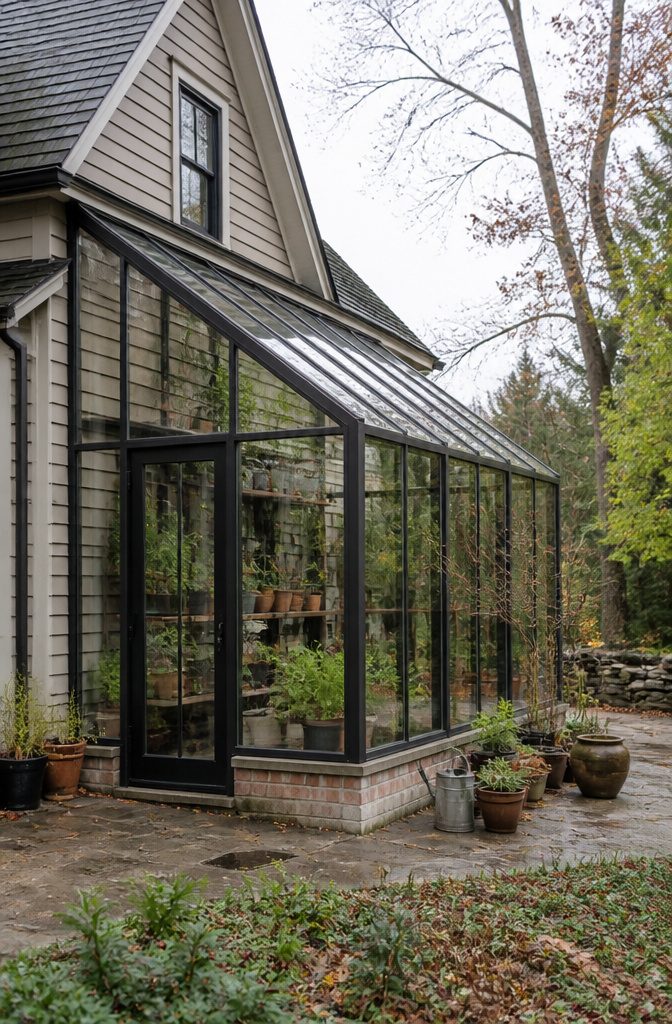
A concrete slab poured to frost depth is the safest bet for an attached greenhouse, but it is not the only one.
Expect to spend $1,000–$6,000 on the foundation, with frost-depth footings pushing the price to the high end in cold climates.
Gravel works for smaller hobby builds in mild zones and drains well, though most jurisdictions will not accept it as a permanent foundation under building codes.
The frame material you choose changes how much weight that foundation carries and how often you are back out there with a brush or a wrench.
Cedar and redwood hold up against rot and pests, but the wood needs staining or sealing every few years to keep moisture from working into the joints.
Aluminum saves you that maintenance; it is light and will not rust, though it transfers heat and cold straight through to the interior.
Galvanized steel handles heavy snow and strong winds without complaint, yet its industrial look suits a working grow space more than a breakfast nook view.
PVC pipe is cheap and easy to cut, and it resists rot, but UV light breaks it down over time and the frame simply is not as strong as metal or wood.
For my own leaning, cedar wins on a house wall where the greenhouse faces the garden you actually live in, and steel wins where the load is real and the look does not matter.

EXTEND YOUR GROWING SEASON YEAR-ROUND: Featuring a high-density reinforced PE cover, our greenhouse creates a stable micro-climate by trapping heat and maintaining optimal humidity. Start your seedlings 4-6 weeks earlier in spring and harvest longer into winter. Give your flowers, tropical plants, succulents, and organic veggies the "protection shield" they need to thrive regardless of the frost outside.

Spacious Walk-in Design: This walk-in tunnel greenhouse measures 15 x 7 x 7 ft. It provides ample space for vegetables, flowers, and potted plants. You can water, prune, and move plants comfortably inside, ideal for home gardening and small-scale growing

Portable Greenhouse: Dimensions 63x54.3x70.9 inch / 160x138x180 cm, this portable green house is designed to protect your plants from unwanted animals, intense sunlight, excessive rainfall, and cold, frost, snow in winter. With its compact size and lightweight design, you can easily move it around to find the perfect spot for your plants
Structural Requirements
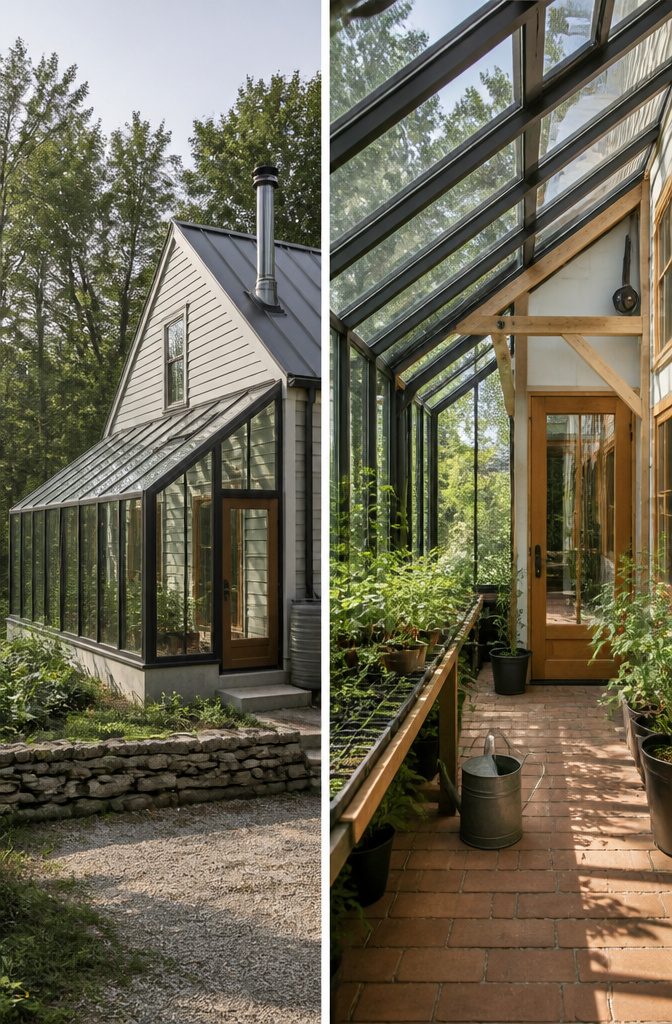
The wall you attach a greenhouse to has to carry weight it was never asked to hold before.
The greenhouse roof bolts to your house through a ledger board anchored into studs or framing, not through siding alone. That connection transfers snow load, wind uplift, and the roof’s own weight straight into your home’s bones.
A structural engineer runs about $500–$1,500 to tell you whether those bones can take it, and for anything larger than a modest lean-to, that fee is cheaper than tearing out rot later.
Waterproofing the roof-to-wall joint is where attached greenhouses fail most often.
Step flashing or continuous flashing has to run beneath your siding and over the greenhouse roof to shunt water away from the wall cavity. Miss this and you are funneling rain into the gap between structures.
Moisture inside the greenhouse is the slower threat. Humidity that migrates through gaps in the vapor barrier, or condensation running down the interior wall, will breed mold and degrade insulation inside the cavity.
A proper vapor barrier on the greenhouse side of that shared wall, paired with adequate ventilation inside the growing space, is what keeps the wall behind it dry for years.

Walk-in Lean-to Greenhouse: Extend your growing season by protecting plants from the cold with this greenhouse. The galvanized steel frame helps prevent chipping and peeling. Includes guy ropes and stakes to secure with ground stakes to keep the structure stable.

SLOPED ROOF & LEAN-TO DESIGN: Higher front, lower back — the sloped roof drains rain quickly and the lean-to design fits neatly against a wall, fence or shed to save space.

Ultimate Plant Protection: Our greenhouse protects your plants and veggies from cold, frost, snow, rain, winds, sun, and unwanted animals. The translucent polyethylene film transmits light while retaining heat and moisture, promoting early growth and long-lasting survival
Ventilation and Temperature Control
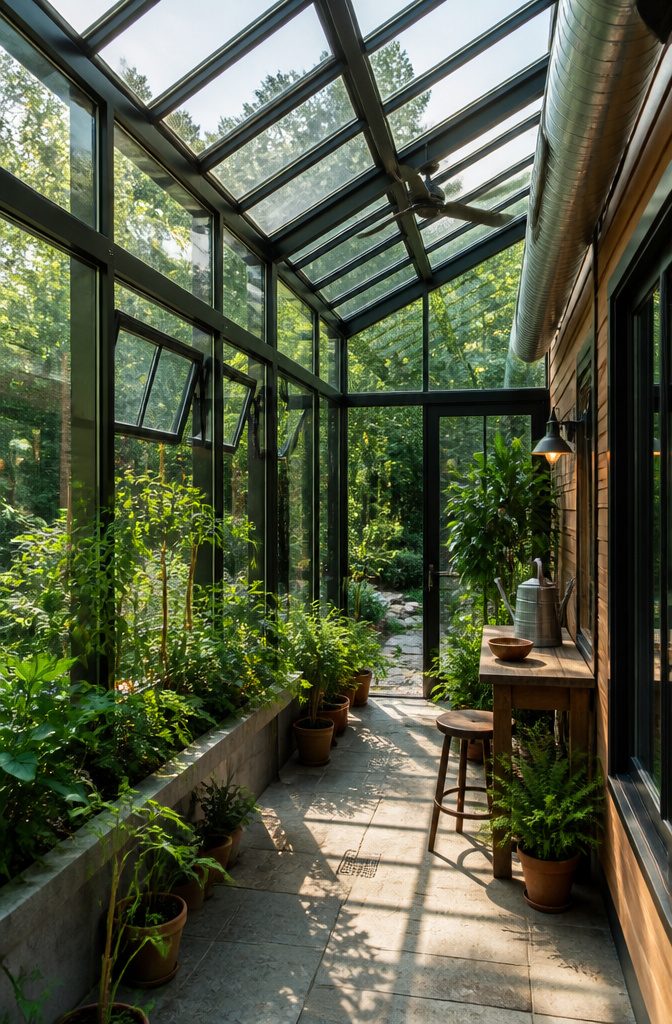
Roof vents do the heavy lifting in a greenhouse on house setup, since hot air rises and the glass traps it.
Automated roof vents that open and close based on internal temperature are worth the upgrade; manual vents get left shut during a workday, and overheating kills plants faster than cold in most climates.
Side vents and doors pull cooler air through at plant level, completing the cross-breeze that keeps leaves dry and strong.
Exhaust fans become necessary once the footprint stretches past what passive vents can handle. Stagnant humidity without air movement breeds fungal disease fast; moving air is the cheapest insurance against losing a crop to gray mold.
For heating, lean-to greenhouses gain some passive solar benefit from the shared house wall, but that is not enough in northern winters.
Electric heaters are the simplest plug-and-play option. Gas heaters cost less to run where propane is cheap, though they need venting.
Shade cloths belong in the same conversation; summer sun through glass can push temperatures past what any plant tolerates, and shading from the outside beats trying to cool already-baked air.

Polycarbonate Panels: The greenhouse roof panels allow 80% light transmission into the greenhouse, which greatly benefits plant growth. Polycarbonate roof panels are different from traditional iron sheds as they are less prone to water seepage and provide ample sunlight for the plants
Polycarbonate Panels: The greenhouse roof panels allow 80% light transmission into the greenhouse, which greatly benefits plant growth. Polycarbonate roof panels are different from traditional iron sheds as they are less prone to water seepage and provide ample sunlight for the plants
Polycarbonate Panels: The greenhouse roof panels allow 80% light transmission into the greenhouse, which greatly benefits plant growth. Polycarbonate roof panels are different from traditional iron sheds as they are less prone to water seepage and provide ample sunlight for the plants
Watering and Humidity Control
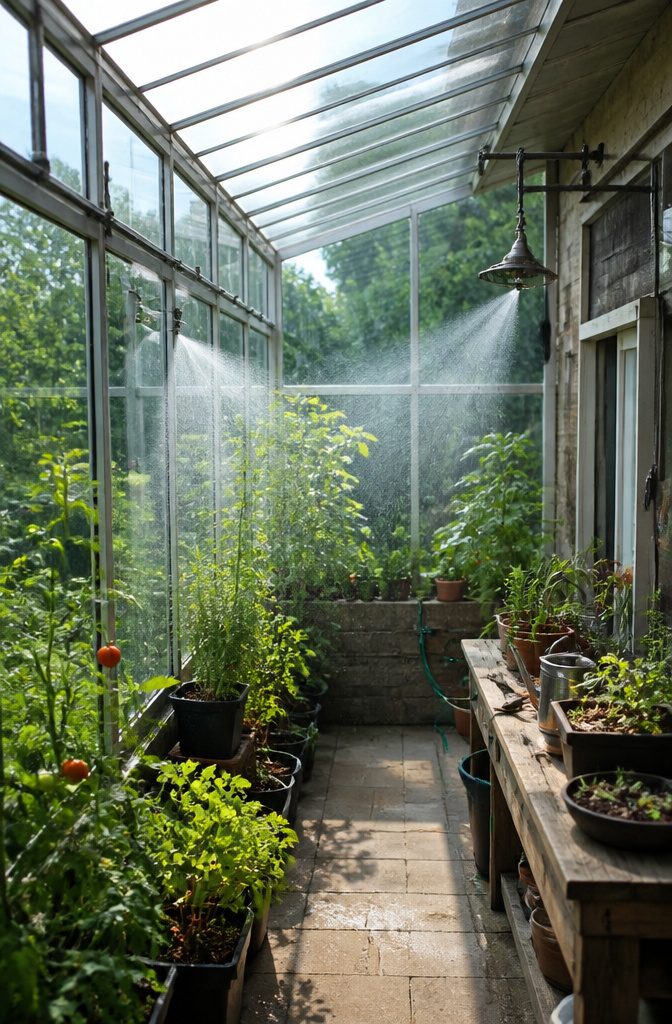
Drip lines beat a watering can the same way a thermostat beats walking outside to check the sky. A lean-to greenhouse shares your house wall, and that wall does not forgive dampness.
The vapor barrier on the shared side is what keeps your studs from turning to mold farms; without it, the humidity that keeps ferns happy will rot your drywall.
I learned the price of this the hard way, or rather I would have if I had skipped the barrier.
A friend who did skip it spent a spring tearing out insulation. The fix is simple enough: polyethylene sheeting behind the interior finish, sealed at every seam, with the greenhouse side vented so moist air exits before it presses inward.
For irrigation, a battery timer on a drip loop runs about $30 and saves the daily chore. Misting nozzles make sense if orchids are your goal, but they push humidity higher, so pair them with a small dehumidifier.
Roof vents help, especially the ones with wax-filled automatic openers that react to temperature without wiring. Those run $30–$75 each and open while you are at work.
The tension is real: plants want wet air, houses want dry.
The shared wall needs to be the line they do not cross. A dehumidifier inside the greenhouse, not the house, keeps both sides healthy without loading your home HVAC with moisture it was never meant to carry.

10 Mil Crawl Space Vapor Barrier - 0.01 inches thick plastic sheeting engineered from low-density polyethylene. Thickness: 10Mil, Width:10ft, Length: 25ft. covering 250 sq.ft. Our rolls of white plastic sheeting are strong and durable - they will not tear or rip easily. Useful as a painter's tarp, vapor barrier, or for general use. Thicker and more durable than a standard 6 mil vapor barrier!

HEAVY-DUTY VAPOR BARRIER – Designed for crawl space encapsulation, moisture control, and weatherproofing applications, this durable polyethylene sheeting helps reduce soil moisture vapor migration and protect foundations, insulation, and structural components from moisture-related damage. Available in multiple thicknesses and sizes to meet different project needs

15 Mil Crawl Space Vapor Barriers - Thickness: 15 Mil, Width: 12 Ft, Length: 12 Ft, Fully deployed 12 'x 12' covering 144 square feet. Utilizing roll packaging for easy unrolling and folding, minimizing creases, and enhancing aesthetics. Useful as your crawl space encapsulation material, painter's tarp, vapor barrier, or anything you want to cover and protect.
Integrating with Your Home
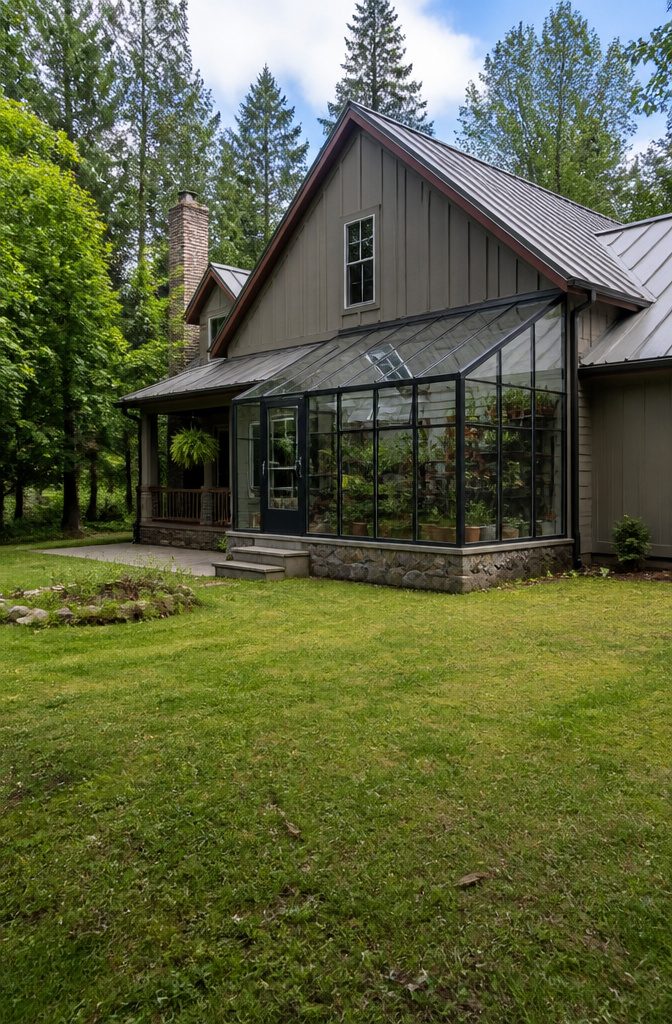
Utility lines are where an attached greenhouse earns its keep.
Water and electricity run off the shared wall, and close access to utilities saves a lot of hassle compared to trenching across a yard for a freestanding unit. The house wall becomes the spine of the whole project.
Aesthetic integration is harder than the plumbing. The greenhouse has to match or complement the home’s style, or it reads as a shed that collided with the siding.
The roof junction needs waterproof flashing, and the glazing should echo the existing windows rather than fight them. A lean-to that shares the house roofline looks deliberate; one that interrupts it looks temporary.
The permitting office will want to see both pieces handled: how the utilities enter, how moisture exits, and how the structure reads from the street.
A greenhouse on house that looks like it belongs there starts with that shared wall and ends with the details that make the two structures speak the same design language.

large walk-in tunnel greenhouse is made of a premium galvanized finish/heavy duty steel frame. The cross bars and 4 reinforced diagonal bars add extra stability. Simple butterfly screw assembly required only.

Roll-up Door and Large Windows: The large door provides easy access to your outdoor greenhouse, and the large mesh sidewalls keep out unwanted guests with wings. Multiple openings allow for cross ventilation, so temperature and humidity are in your hands
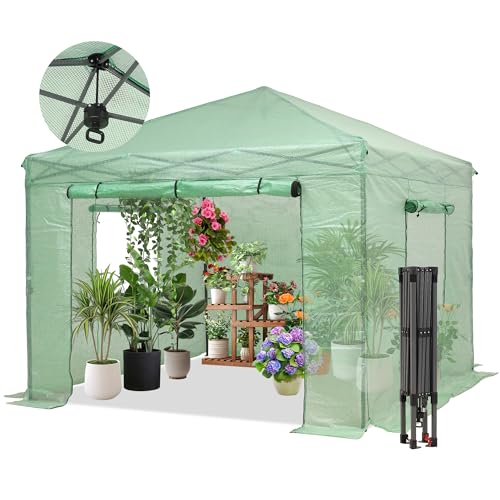
Easy Setup:This pop-up greenhouse with one-click lift-up installation can be set up by one person in minutes. The pre-assembled frame allows for quick setup without any tools. Whether you're an experienced gardener or a beginner, our outdoor pop-up greenhouse will save you time and effort.
Planning for Growth
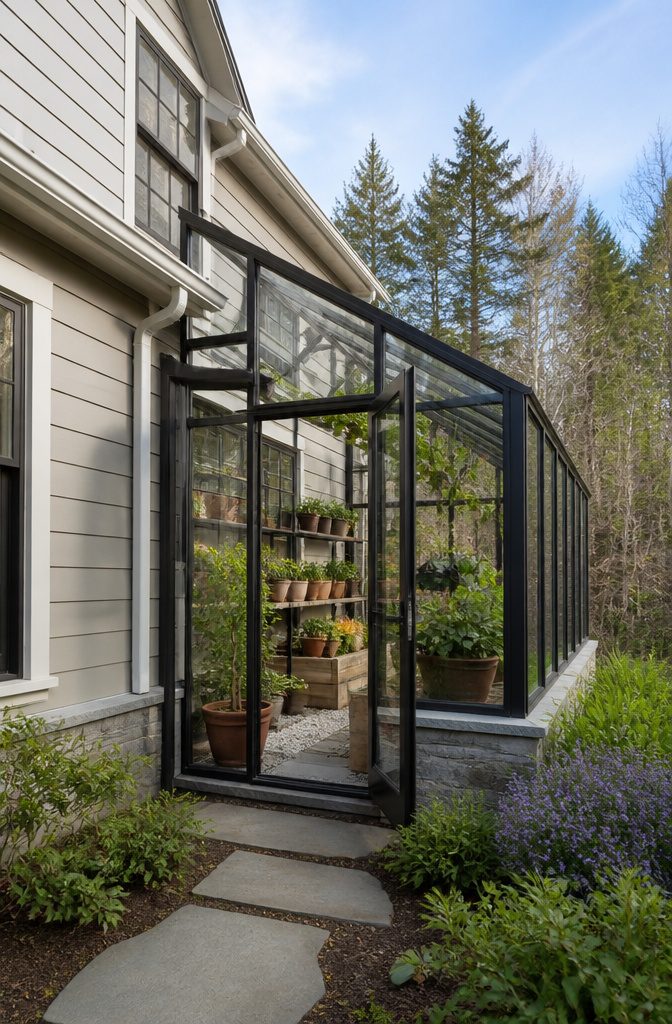
The greenhouse on house you build this year will probably not be the greenhouse you want three years from now.
I learned that from watching a neighbor’s lean-to evolve: what started as a tomato bench swallowed half their patio once orchids moved in. Modular end walls are the detail that saves you from tearing out framing later.
Design the structure so one or both ends can be removed without disturbing the glass or the house attachment, and expansion becomes a weekend project instead of a rebuild.
Movable benches and shelves carry the same logic. A fixed layout looks tidy in February but traps you when summer brings in the six-foot tomato vines or when you decide to overwinter citrus.
I have seen growers lose half their floor space to pots they could have stacked on rolling shelving. The first configuration is almost never the last, so build in the wiggle room from the start.

【 Spacious Space with 3 Tier Plant Stand 】 The walk-in wall greenhouse measures 7' x 3.5' x 7' (L x W x H), providing enough growing space for seedlings, flowers, herbs, vegetables, fruits, and more. Besides, it is equipped with a 3-tier flower rack, bringing convenience for centralized fertilization and watering

214cm x 118cm walk-In greenhouse: A spacious piece. Grow plants, vegetables, herbs and flowers all year long. Size is great for smaller gardens and outdoor areas.
Permits and Regulations
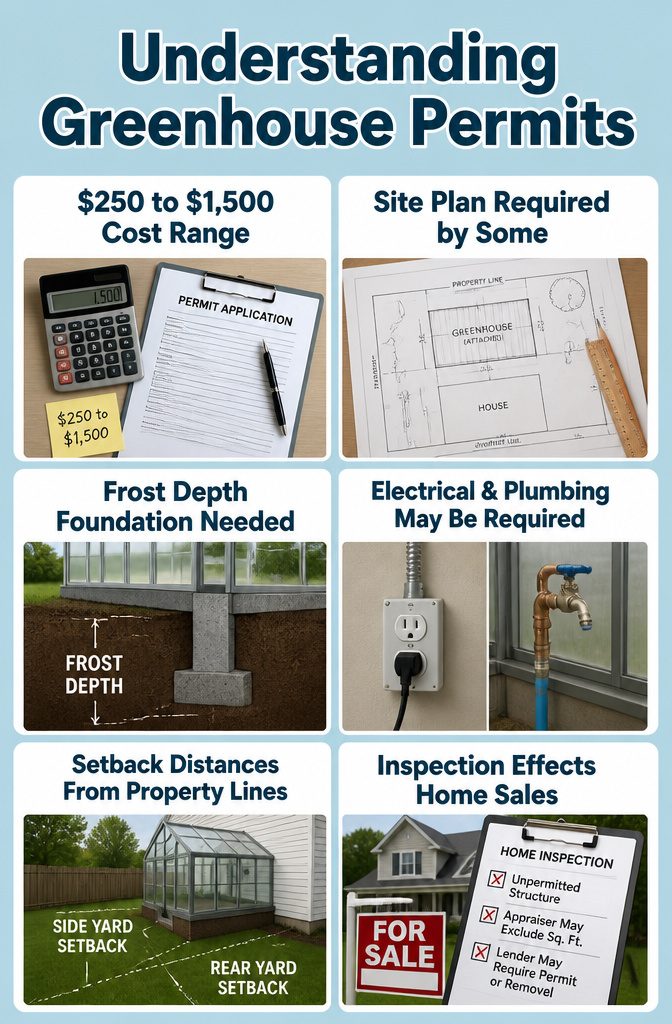
Permits for an attached greenhouse run $250 to $1,500, and that spread tells the whole story.
My own city wanted a full site plan showing the footprint against property lines, while a friend two towns over filed a one-page form and walked out same-day.
The attachment to your primary structure is what triggers the extra scrutiny; a freestanding shed in the same backyard might not need anything.
What inspectors actually flag varies even more. Frost-depth foundations, ledger board specs, fastener schedules, flashing at the roof-to-wall junction, electrical if you want outlets or grow lights, plumbing if you run water, and setback distances from property lines.
Some of that your contractor handles; some of it you draw yourself at the kitchen table and hope the scale looks right.
The real cost of skipping it shows up later. Unpermitted attached structures surface in home sales: inspectors flag them, appraisers may exclude the square footage, and buyers’ lenders can demand permitting or removal before closing.
I have watched a neighbor stall a closing over a sunroom he built in 2019 without a ledger inspection. The permit cost would have been the cheapest part of that project.

[High Transmittance & UV Protection] Made of optical-grade material, this polycarbonate sheet has over 90% light transmittance. Sunlight slips through easily, giving plants a full "sunbath" for photosynthesis. Its UV-resistant coating blocks 99% of UV rays—no wilting plants, and unlike low-quality greenhouse plastic, it won’t yellow or age.
Polycarbonate Panels: The greenhouse roof panels allow 80% light transmission into the greenhouse, which greatly benefits plant growth. Polycarbonate roof panels are different from traditional iron sheds as they are less prone to water seepage and provide ample sunlight for the plants
Polycarbonate Panels: The greenhouse roof panels allow 80% light transmission into the greenhouse, which greatly benefits plant growth. Polycarbonate roof panels are different from traditional iron sheds as they are less prone to water seepage and provide ample sunlight for the plants
Greenhouse Types Compared
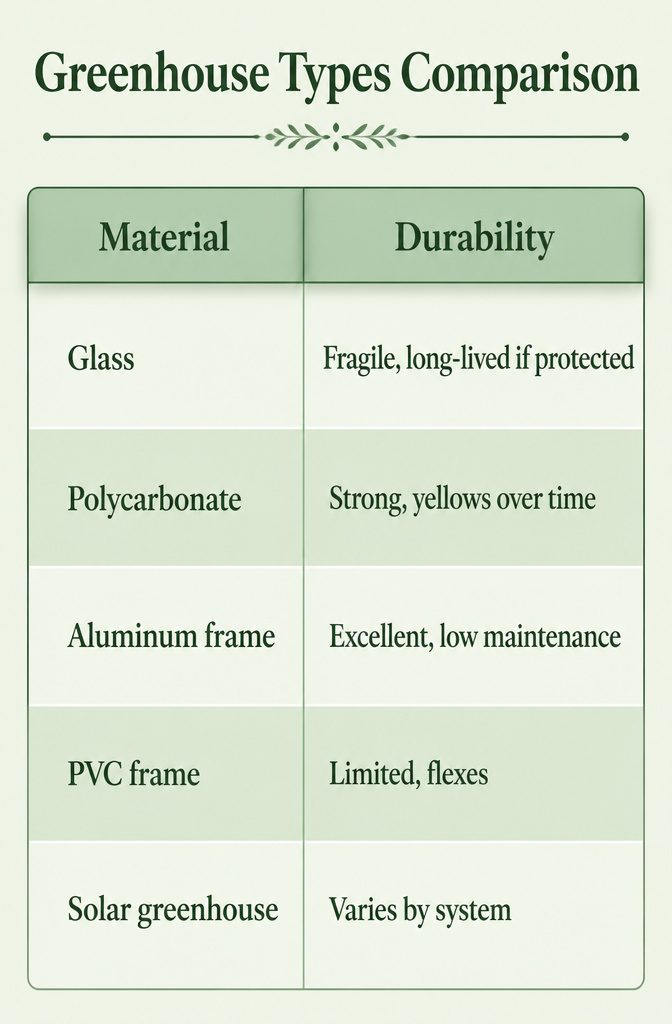
The frame and glazing you choose for a greenhouse on house project decides whether you’re rebuilding it in five years or walking past it in twenty.
Glass gives the classic look and the best light, but it breaks and it costs.
Polycarbonate panels are lighter, tougher, and insulate better; they yellow over time, especially on the south face, so budget for replacement panels down the line. Aluminum frames last with almost no upkeep.
PVC saves money upfront, though the material flexes too much for anything much bigger than a small lean-to. Wood looks warm and takes paint well, yet it rots without regular attention.
| Material | Durability | Cost Range | Insulation | Best Fit |
|---|---|---|---|---|
| Glass | Fragile, long-lived if protected | High | Low | Aesthetics, mild climates |
| Polycarbonate | Strong, yellows over time | Moderate | Good | Most home projects |
| Aluminum frame | Excellent, low maintenance | Moderate–high | Depends on glazing | Permanent structures |
| PVC frame | Limited, flexes | Low | Moderate | Small builds only |
| Solar greenhouse | Varies by system | High upfront | Excellent | Serious year-round growing |
A solar greenhouse with thermal mass and proper orientation runs warmer in winter without added heat, though the upfront investment runs higher than a basic lean-to.
For most renters and first-home owners, polycarbonate on aluminum balances cost, warmth, and longevity well enough that you are unlikely to rebuild before the mortgage is half paid.

10 Mil White Plastic Sheeting - 0.01 inches thick plastic sheeting engineered from low-density polyethylene. Thickness: 10Mil, Width:10ft, Length: 100ft. covering 1000 sq.ft. Our rolls of white plastic sheeting are strong and durable - they will not tear or rip easily. Useful as a painter's tarp, vapor barrier, or for general use. Thicker and more durable than a standard 6 mil vapor barrier!

HEAVY-DUTY VAPOR BARRIER – Designed for crawl space encapsulation, moisture control, and weatherproofing applications, this durable polyethylene sheeting helps reduce soil moisture vapor migration and protect foundations, insulation, and structural components from moisture-related damage. Available in multiple thicknesses and sizes to meet different project needs

HEAVY-DUTY VAPOR BARRIER – Designed for crawl space encapsulation, moisture control, and weatherproofing applications, this durable polyethylene sheeting helps reduce soil moisture vapor migration and protect foundations, insulation, and structural components from moisture-related damage. Available in multiple thicknesses and sizes to meet different project needs
What a Lean-To Costs
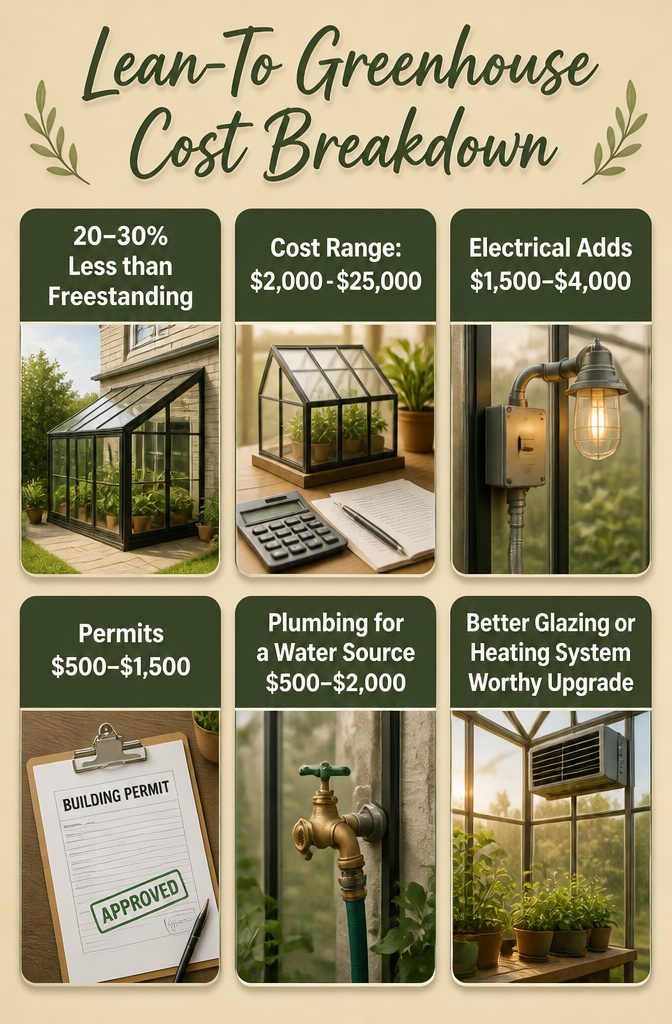
A lean-to greenhouse runs 20–30% less than a freestanding build of the same size because one wall is already standing.
The savings land somewhere between $2,000 for a small basic model and $25,000 for a large mid-range one, with the wall you skip accounting for most of that gap.
The money still has to go somewhere.
Foundation, frame, glazing, and basic climate control eat the bulk of any budget. Electrical adds $1,500–$4,000, permits run $500–$1,500, and plumbing for a water source is another $500–$2,000.
What you save on structure often gets redirected. Better glazing or a heating system swallows the difference fast, and in practice the "cheaper" build becomes the better-spec’d build instead of the smaller receipt.

Large Walk-in Space: This outdoor greenhouse measures 57 x 61 x 80 in, giving you room to walk in and care for plants. 10 shelves, including 4 on each side and 2 larger front shelves, help organize herbs, flowers, seed trays, and small to medium pots.

Winter-Grade Outdoor Plant Growth: Protect plants from cold, wind, rain, and wild animals. Control heat and humidity. Let in 90% of light, and UV stop sun damage. This thick polycarbonate wall walk-in greenhouse gives you a personal plant nursery for your garden. If it's green, you can house it: vegetables, herbs, flowers, or tropical saplings. Stay in the soil all year.

8-SHELF GREENHOUSE KIT - The 8 greenhouse shelves provide plenty of room for trays, pots, or planters of anything you want to grow. Each shelf comes with zip ties to secure them to the sturdy metal frame, preventing them from tipping over.
What Can Go Wrong
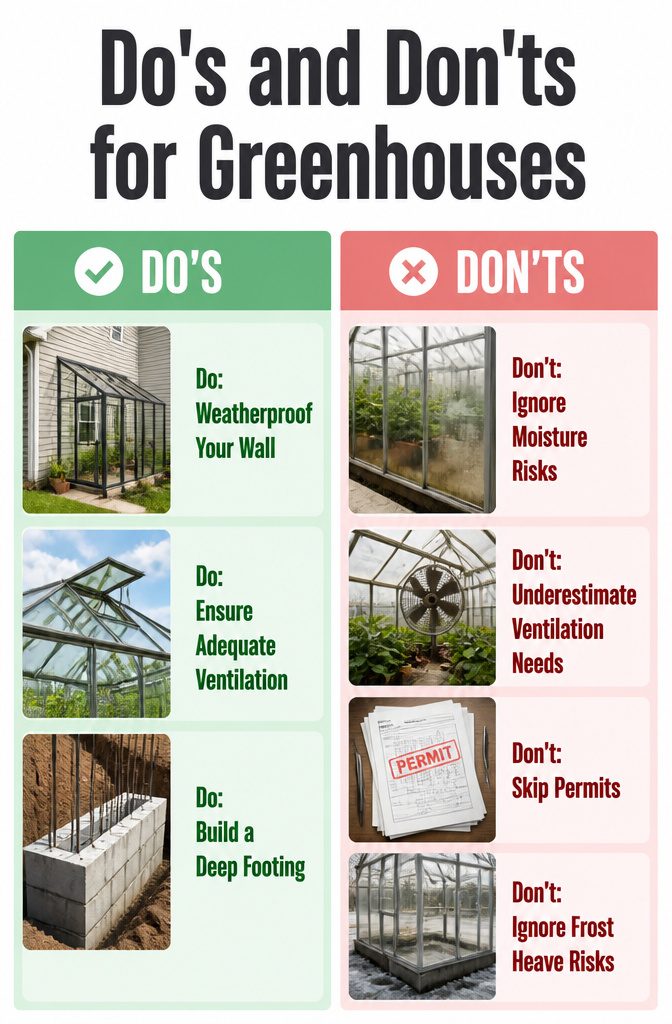
Moisture has a way of finding every path you forgot to seal.
A lean-to greenhouse pressed against siding will funnel condensation straight into the wall cavity if the flashing stops even an inch short, and by the time you notice the drywall softening, the studs are already compromised.
The wall you build against needs the same weatherproofing as an exterior wall facing rain, because inside that glass box it will face more wet hours than any open yard.
Ventilation mistakes smell before they show. A greenhouse without enough roof vents or a low intake path turns into a mold farm within one humid season, the colonies starting behind the benches where air sits still.
The fix is cheaper in the plan than after the paneling is up, yet most people size fans for summer heat and forget the January scenario: outside below freezing, sun pouring through glass, humidity trapped against a cold house wall.
Frost heave separates the projects that last from the ones that lean. The foundation has to hit below the frost line with a real footing, not a slab that rides the seasonal swell like a raft.
One builder I read about hand-dug four feet to bedrock and laid block with rebar and concrete fill; overkill for a weekend build, but the principle stands.
A footing that skimps on depth saves Saturday labor and costs you the structure in three winters.
Permits pulled after the fact are a negotiation you cannot win. Some regions require them for any greenhouse, some only for attached structures, and the variance between zip codes is wide enough that guessing wrong means tearing out finished work.
The building department does not care that the tomatoes are already planted.
Key Parts and What They Do
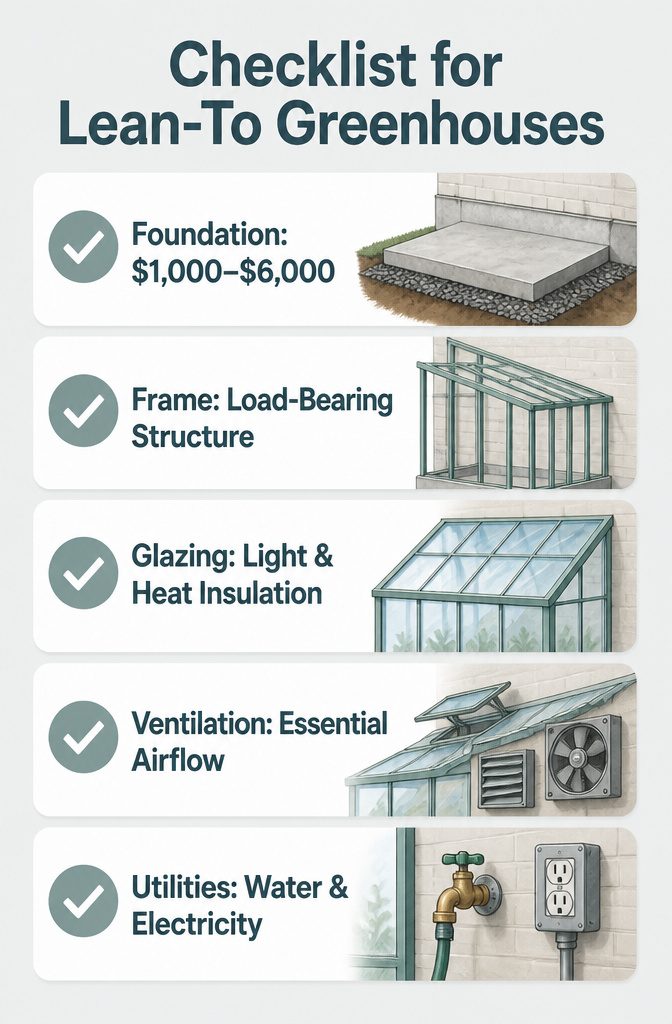
A lean-to greenhouse is only as good as the five parts holding it together.
- Foundation. The greenhouse needs its own supports even though it shares your house wall. Pouring directly against an exposed foundation wall gives a clean connection, but the joint needs careful waterproofing or water will find its way in. Most people end up with an independent concrete slab or footings that run $1,000–$6,000 and must drop below the frost line in cold climates. A compacted gravel base works for smaller hobby builds in mild zones, though it will not pass code for permanent structures in most jurisdictions. The real risk is compromising your existing house foundation: excavating too close, directing water toward the wall, or letting things settle unevenly creates problems that spread well past the greenhouse itself.
- Frame. This is what keeps the structure standing against snow load and wind. The frame transfers every force down to the foundation, so the connection between the two has to be deliberate. Lag bolts set into block cores during the pour let you anchor the wall plates solidly.
- Glazing. The panels or glass that let light in and hold heat. This is your insulation layer and your solar collector at once; the material choice determines both how much sun reaches the plants and how fast heat escapes once the temperature drops.
- Ventilation. Roof vents, side vents, and louvers move air manually or on automatic temperature sensors. Without them, heat and humidity spike fast. Larger lean-tos usually need exhaust fans to keep air circulating enough to prevent disease and overheating.
- Utilities. Water and electricity connections turn the structure from a sunroom into a working greenhouse. A hose bib inside saves you carrying water through the house in February; an outlet lets you run fans, heaters, or automatic vent openers without extension cords snaking across the yard.
Frequently Asked Questions
Can you attach a greenhouse to your house?
Yes, attaching a greenhouse to your house is possible and one of the most popular ways to build one.
An attached greenhouse, often called a lean-to greenhouse, shares a wall with your existing home, which reduces construction costs by 20–30%, simplifies utility connections, and gives you direct indoor access.
The project does introduce structural, moisture, and permitting considerations that a freestanding greenhouse does not.
What is a greenhouse attached to a house called?
A greenhouse attached to a house is most commonly called a lean-to greenhouse or an attached greenhouse.
The terms are used interchangeably; both describe a structure that shares one wall with an existing building. This design saves space and provides easy access from the home.
What are the structural requirements for an attached greenhouse?
The shared wall must be load-bearing and properly waterproofed. A ledger board anchors into studs or framing, not through siding alone, to transfer snow load, wind uplift, and roof weight into your home’s structure.
Step flashing or continuous flashing must run beneath your siding and over the greenhouse roof to prevent water intrusion. A structural engineer costs $500–$1,500 and is worth the fee for anything larger than a modest lean-to.
How do I manage humidity in an attached greenhouse?
Use a proper vapor barrier on the greenhouse side of the shared wall, paired with adequate ventilation inside the growing space. Polyethylene sheeting sealed at every seam behind the interior finish keeps moist air from reaching your studs.
A dehumidifier inside the greenhouse, not the house, protects both sides without overloading your home HVAC. Roof vents with wax-filled automatic openers ($30–$75 each) help by letting hot, humid air escape while you are away.
What permits do I need to build an attached greenhouse?
Building permits are typically required for attached greenhouses and run $250–$1,500. The attachment to your primary structure triggers extra scrutiny compared to a freestanding shed.
Inspectors usually review frost-depth foundations, ledger board specs, flashing details, electrical, plumbing, and setback distances. Unpermitted structures can stall home sales later, with buyers’ lenders demanding proper permitting or removal before closing.
What materials are best for building a lean-to greenhouse?
Frame materials include cedar, redwood, aluminum, galvanized steel, and PVC, each with distinct tradeoffs.
Cedar and redwood resist rot but need restaining every few years. Aluminum is low-maintenance but transfers heat and cold.
Galvanized steel handles heavy snow but looks industrial. PVC is cheap and easy to cut but weakens under UV exposure.
For glazing, polycarbonate panels insulate well and resist breakage, though they yellow over time on south-facing walls. Glass looks classic but breaks easily and insulates poorly.
What are the downsides of attached greenhouses?
Moisture damage to the shared wall is the biggest risk; condensation and humidity will rot studs and degrade drywall if the vapor barrier or flashing is incomplete.
The project also demands more complex permitting than freestanding builds, and the structure’s appearance can clash with your home if not carefully designed.
Foundation work near your existing house wall carries the risk of compromising that structure through poor excavation or drainage.